 Welcome to the new Dark Mode! If you'd like to browse in Light Mode, head over to your
 | “ | You got me wrong. You will be dying here much faster than in the Capital. Your body is wasting away just as a boat sinks with its hold full of water. Breathe in this air. Can you feel it? | „ |
| — Eva Yan, Day 1 of Pathologic |
The Town is unlike a normal world—people can starve or tire themselves to death within a single day. Locals claims that it's in the air; that every breath you inhale is slowly killing you.
The player must manage a variety of stats to stay alive, each function closely linked to the other. Along with basic bodily functions such as health or hunger, the player is also faced with outside forces such as reputation or the flow of time.
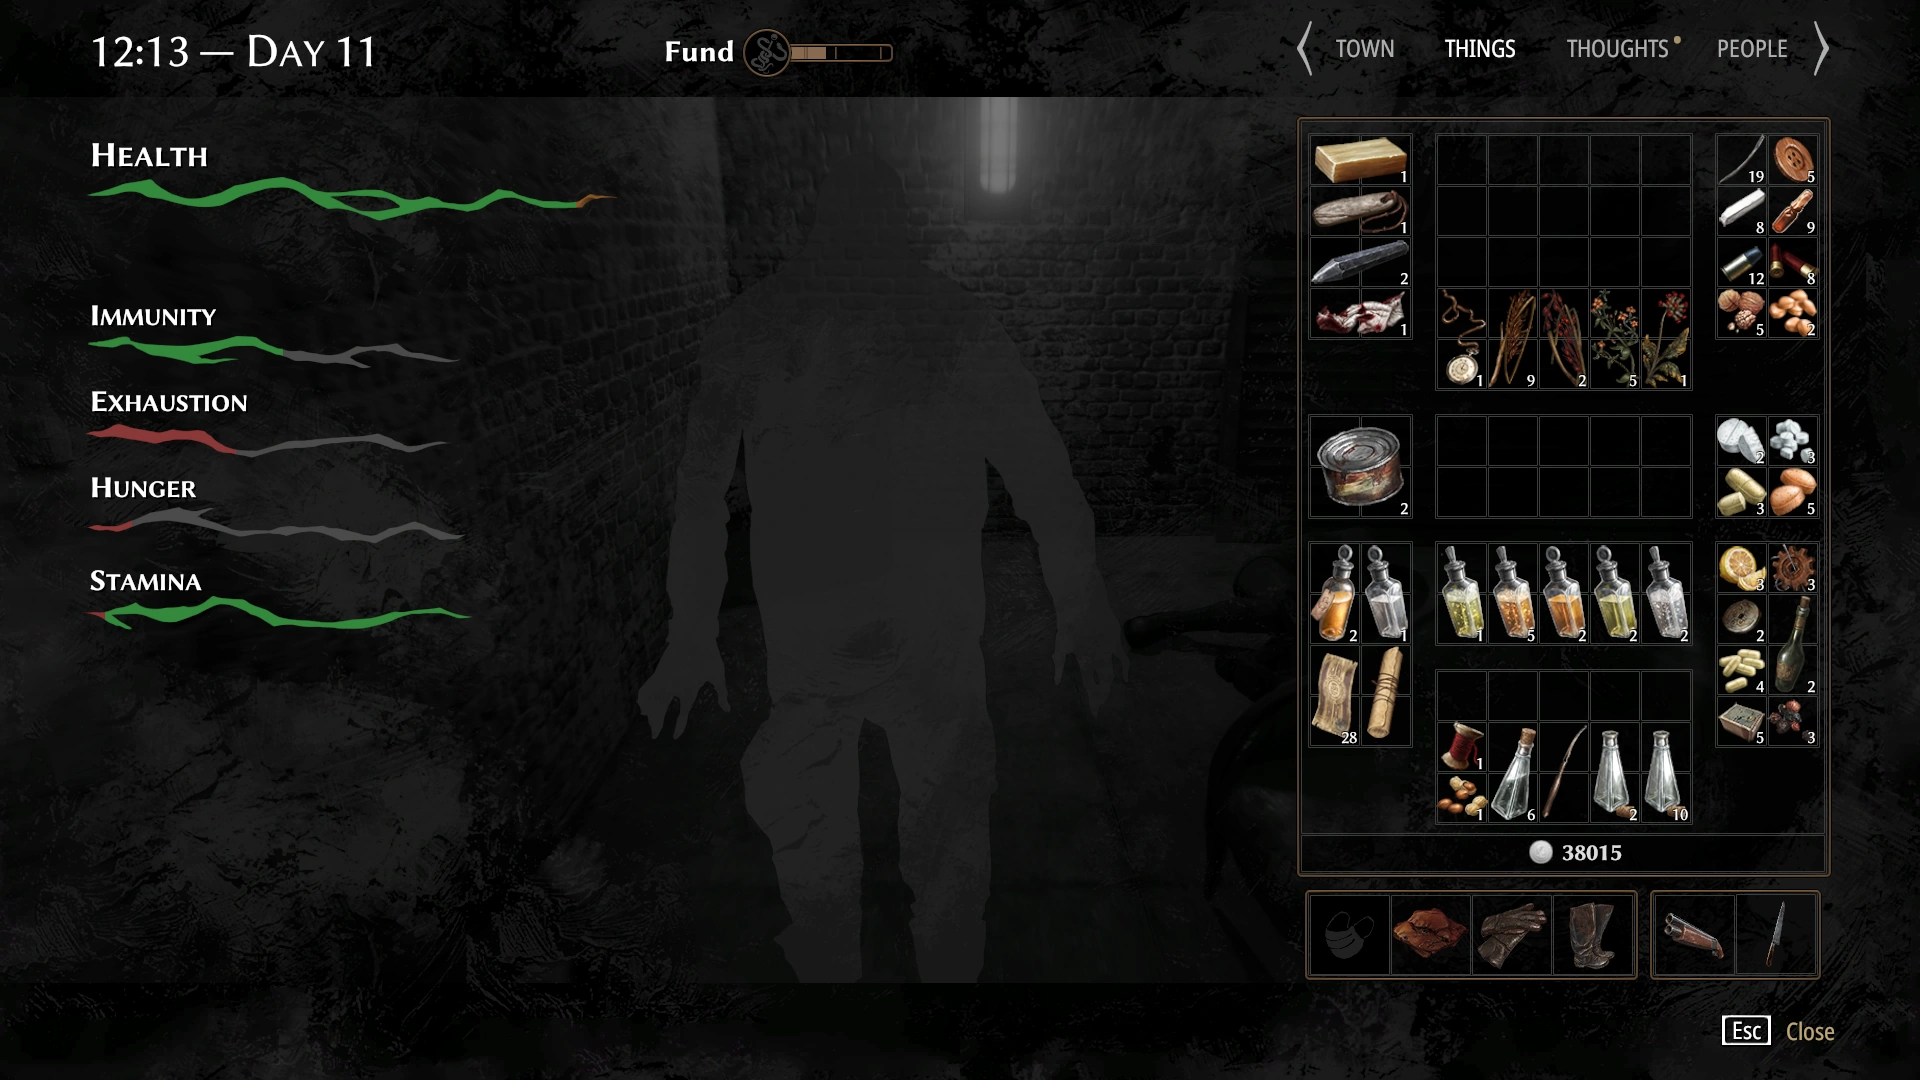
Pathologic

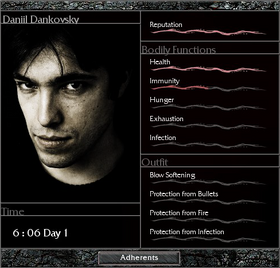
Player stats menu
Bodily Functions
Health
- The player's core stat. It is tied to all other functions—if you become hungry, exhausted, or infected, your health will suffer. Health can also be lost during combat.
- Health is increased by healing items such as tourniquets or bandages. Additionally, painkillers increase health should they be taken before the player sleeps.
Immunity
- Immunity is tied directly to the player's infection and acts as a "buffer" between the plague and the player's other stats. While the immunity meter is full, it slows the progress of infection or can prevent it altogether.
- It can be be managed and increased by immunity-boosting medicines, preventative vaccines and clothes.
Hunger
- Naturally, hunger is sated by food items. Increases hourly. If the meter is full, the player's health will decrease continually until hunger is decreased, or death.
- Food can be bought at stores, traded for with patrolmen, or occasionally found. Different kinds of food can affect stats in different ways: for example, lemons strengthen immunity but increase hunger, while water lowers hunger but increases exhaustion.
Exhaustion
- Fatigue increases as the day passes. If the meter reaches full, the player's health will slowly decrease.
- The ideal way to deal with exhaustion is to sleep—but you can only sleep in the beds of private homes, such as the houses of Bound characters. Coffee can also be used to decrease exhaustion at the expense of health.
Infection
- The player's level of sickness. Once infected, the meter increases continually; the higher the infection, the more health the player loses over time.
- Infection cannot be fully removed without the use of special items or flamethrowers' fire, but can be managed by using antibiotics.
Other Factors
Reputation
- The level of respect the townspeople have for the player. The lower the meter, the higher the chances the player has of being attacked and losing services. It can change greatly depending on the day or the choices of the player.
- Reputation can be increased in a number of ways: completing quests, helping plague victims, getting rid of bandits, or donating money to sickly men. Likewise, it can also be reduced by killing or insulting townsfolk.
- While the Bachelor begins the game at full reputation, both the Haruspex and the Changeling begin with low reputation. In addition, the Changeling's reputation is constantly decreasing.
Time
- Like in our world, the days in the Town remain divided into 24 hours. One in-game hour corresponds to around five real-world minutes.
- Midnight marks the deadline for quest completion and events, though 7:00AM is considered the start of the next day. Be warned—if quests remain uncompleted by the end of the day, they will be failed and one of the player's Bound will fall ill.
Character Mechanics
- All characters have access to an oil lamp. This lamp is not an item, but an innate ability. It requires kerosene to work and if the player has kerosene, they may press 'F' to use it. The lamp's only function is to improve the lighting around the player should they wish to see the environment more clearly.
Bachelor
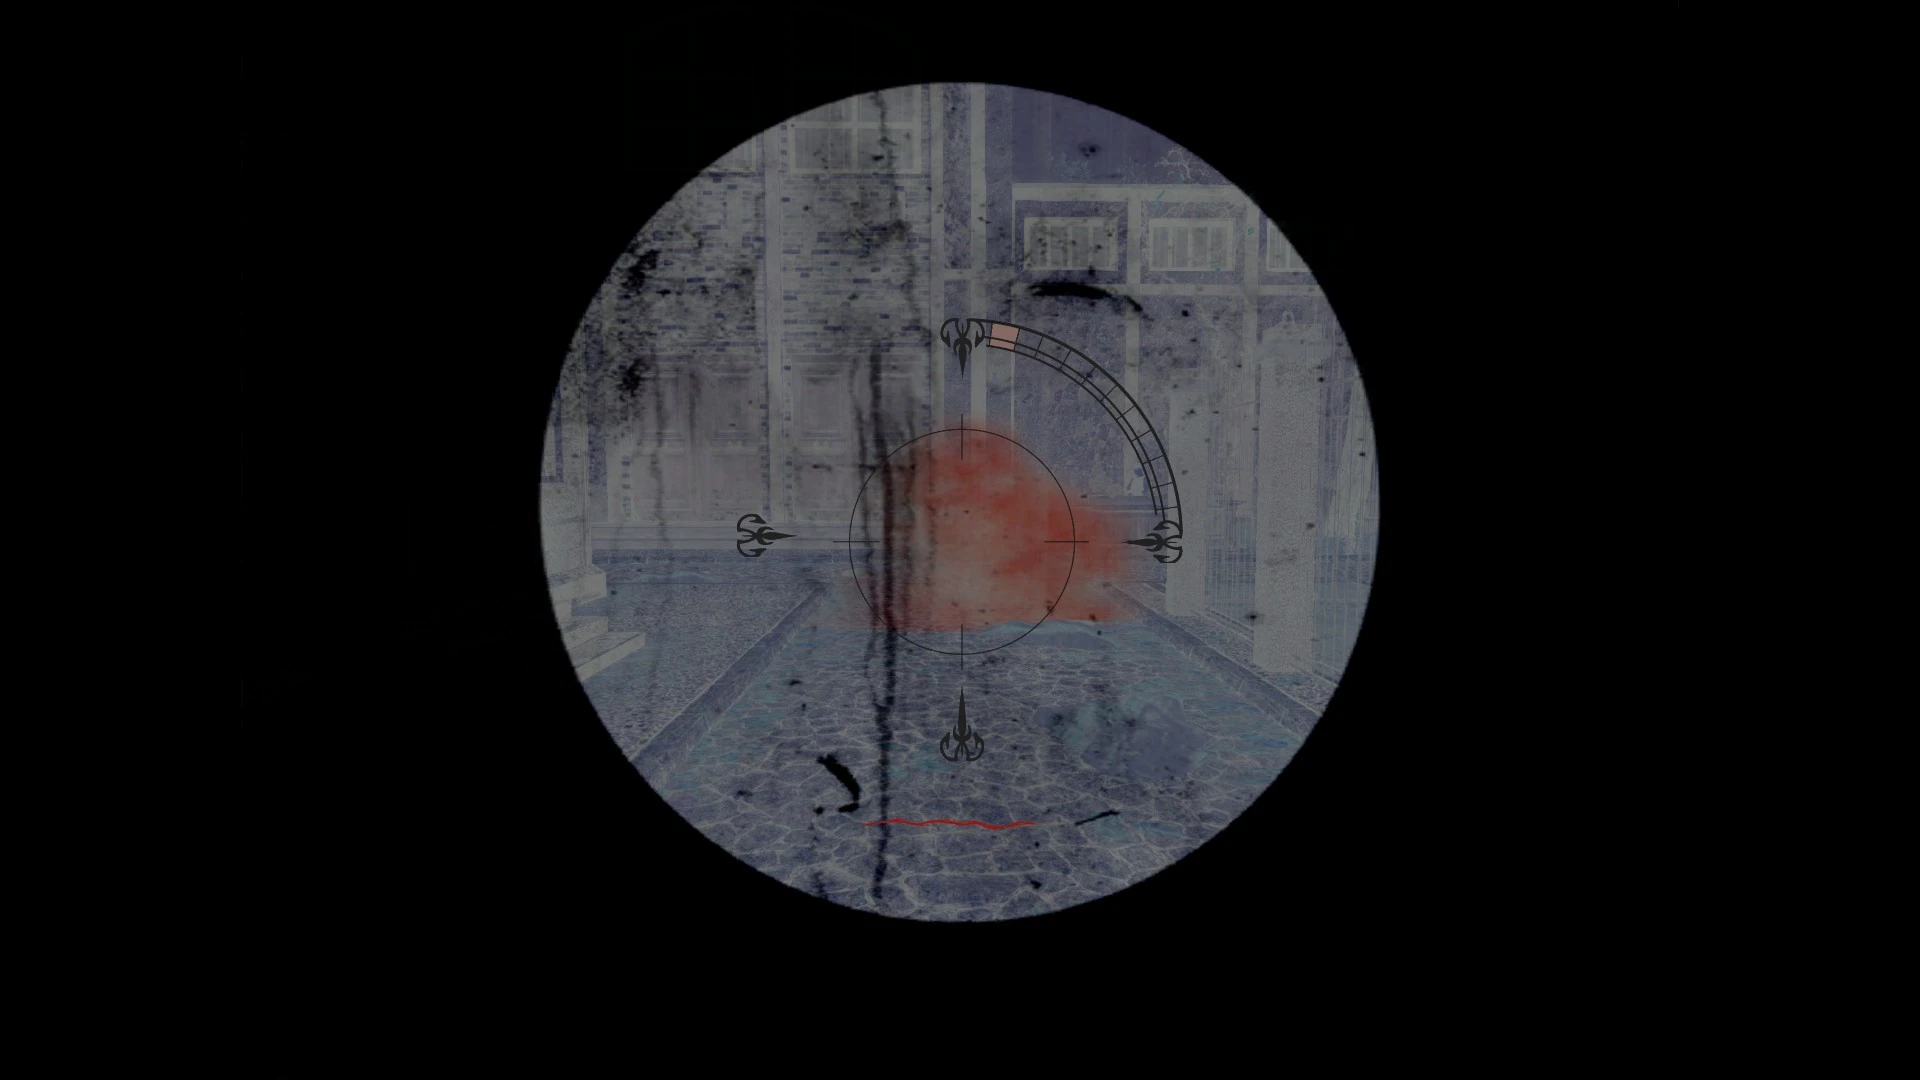
- The Bachelor has access to the Plaguefinder. It is not an item that can be equipped or found in the inventory, but an innate ability that can only be utilized by the Bachelor.
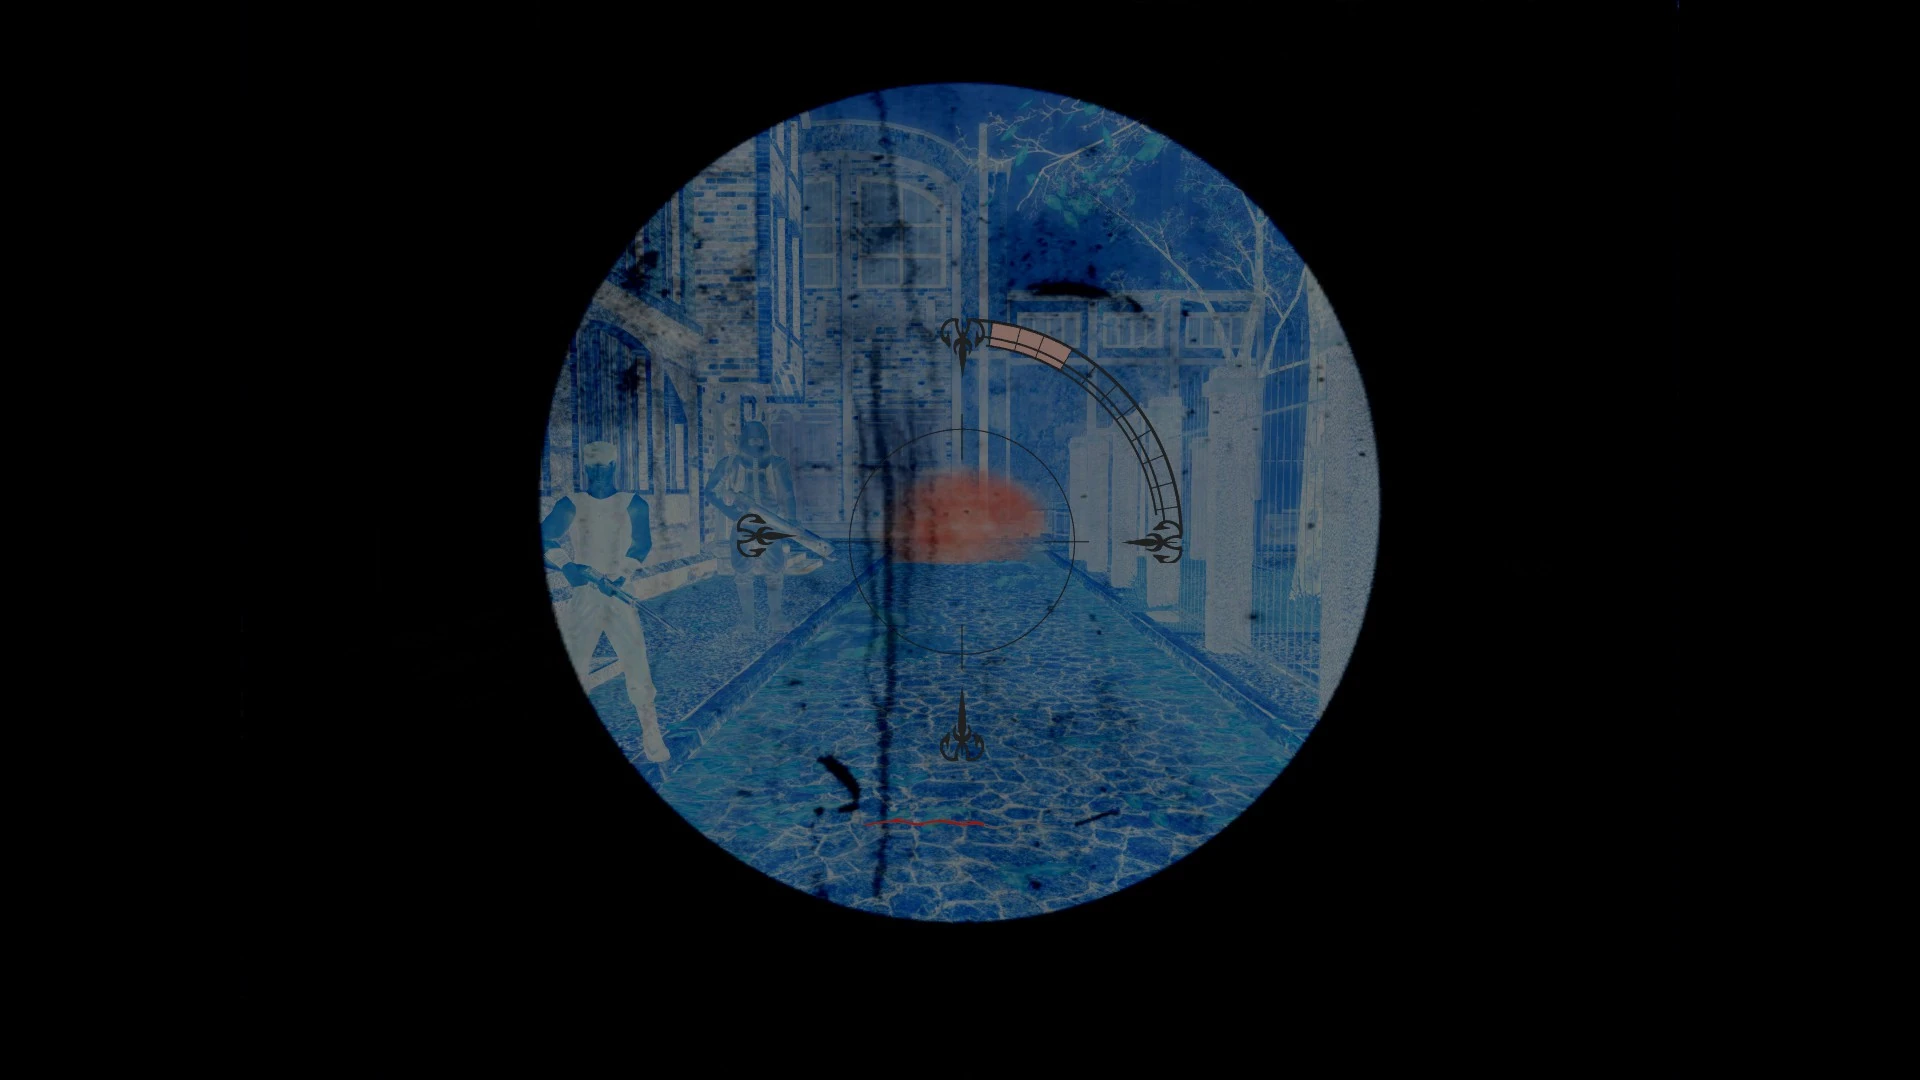
- When used, the Bachelor can see Sand Plague clouds further than initial eye sight. By using lenses, the Bachelor is able to upgrade the Plaguefinder and increase the range at which it can detect Plague clouds.
- The Bachelor can also participate in the Ring of Suok.

Plaguefinder with basic lens equipped in Pathologic Classic HD

Plaguefinder with basic lens upgraded in Pathologic Classic HD

Plaguefinder with basic lens upgraded for the second time in Pathologic Classic HD

Plaguefinder with basic lens upgraded fully in Pathologic Classic HD


Haruspex
- The Haruspex has the ability to find Herbs throughout the Steppe and in the Town. These can be used to brew tinctures such as Twyrine Extracts and Dead Gruel in the Haruspex's Lair. These herbs can also be traded for from Worms at gatherer huts and traded to Andrey Stamatin in Andrey Stamatin's Pub.
- The Haruspex can also participate in the Ring of Suok and in Rat Racing.
Changeling
- The Changeling has the ability to find Herbs throughout the Steppe and in the Town. These herbs can be traded to Andrey Stamatin at Andrey Stamatin's Pub.
- For details on trading with Andrey, see here.
- The Changeling has a special melee attack that can also heal infected townsfolk from up close in exchange for some health, which grants her reputation. The Changeling can also participate in Rat Racing.
Money
- The price of items sold in stores changes each day, and the amount of money dropped by Townsfolk scales accordingly. Price changes are coded uniquely for every item, but each class of item typically follows the same pattern. Generally, Day 1 prices are very low, then inflate by 5 to 10 times on Day 2, drop by about half on Day 3, and fluctuate less dramatically from then on. The Changeling experiences less inflation on Day 2. See each item's page for a day-by-day breakdown of its price changes.
- The player may randomly receive a small (1-3) amount of money when walking around. This amount does not change with inflation.
- Stores typically sell items at 110% of their base price and buy items at 90% of their base price, but some stores may have higher markups.
Trading
- All playable characters have the ability to trade with the townsfolk. Trading with different townsfolk allows the player to obtain resources that may be difficult to obtain, if not otherwise impossible.
- For details on trading and the various types of trades available, see Trading.
Pathologic 2
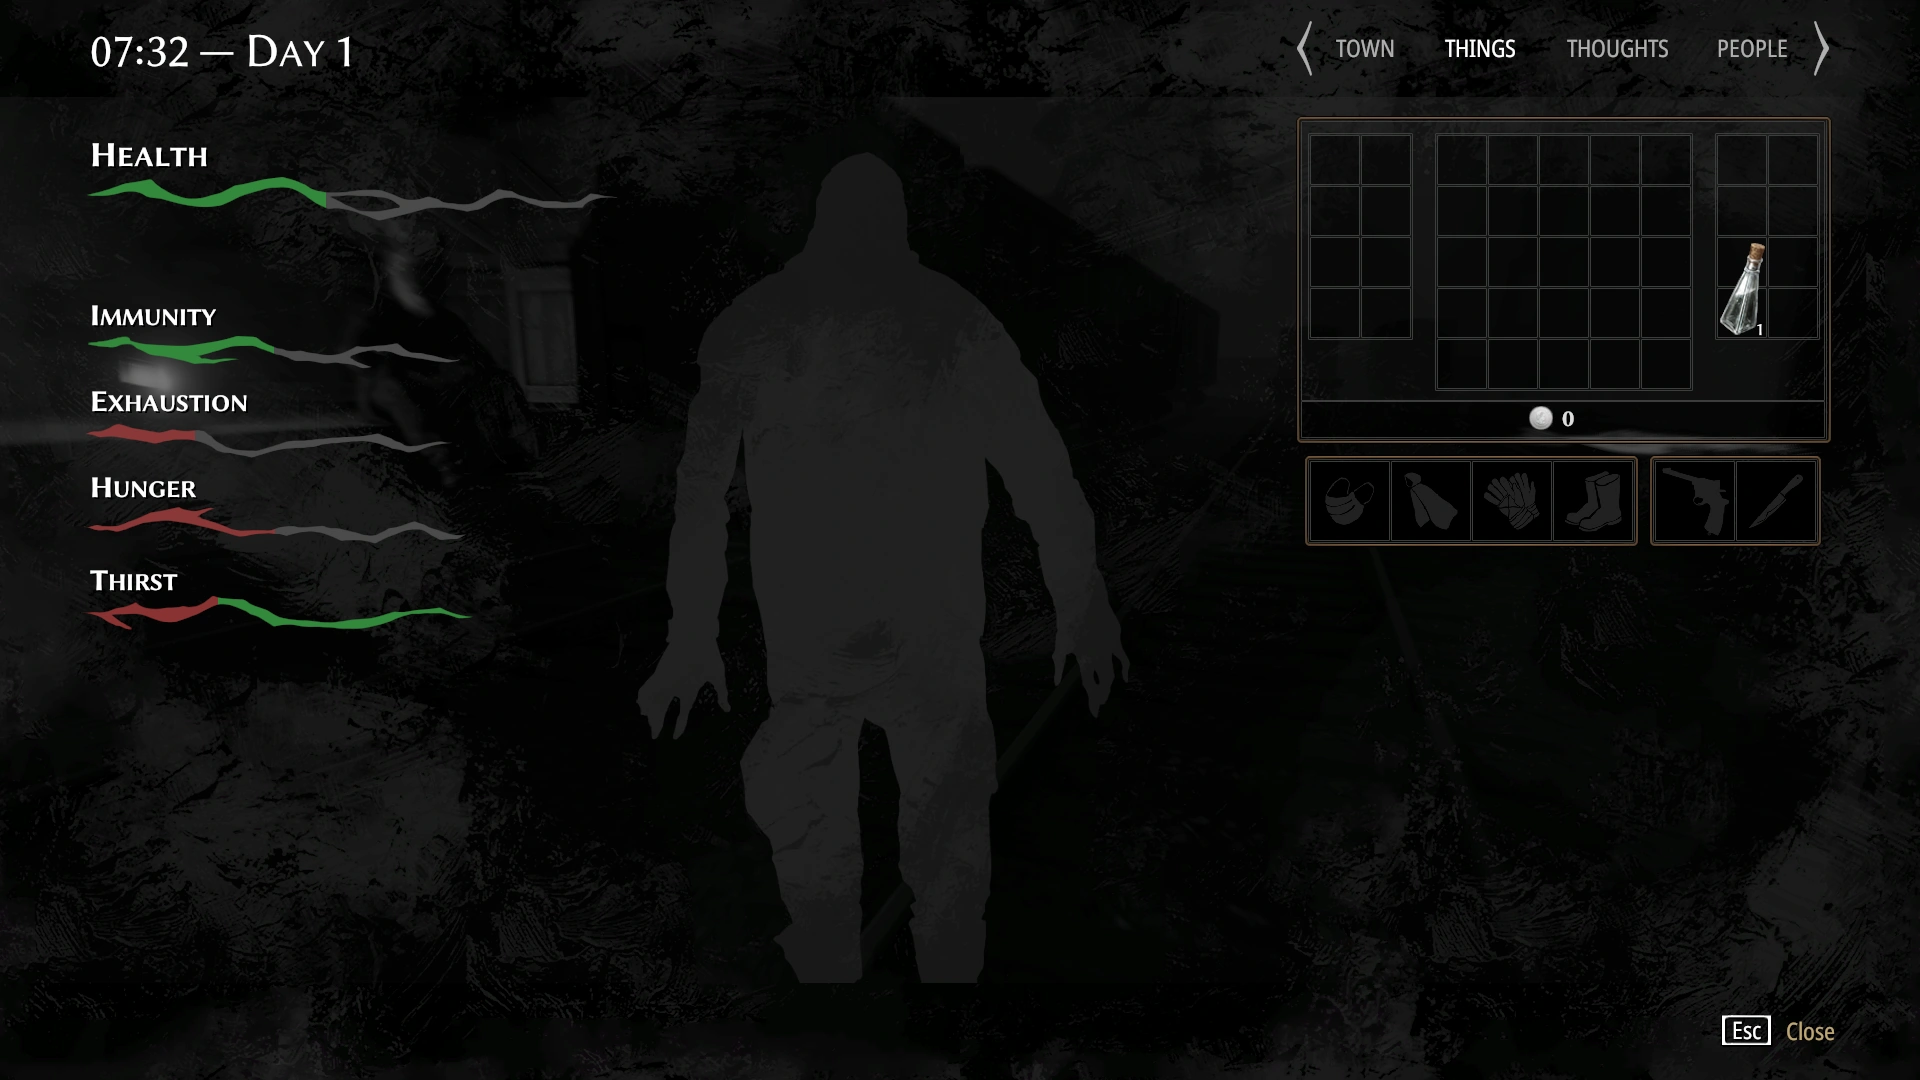
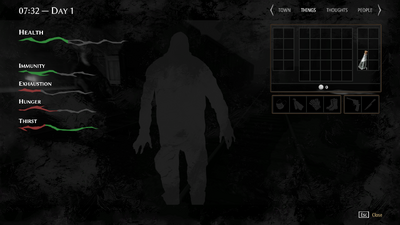
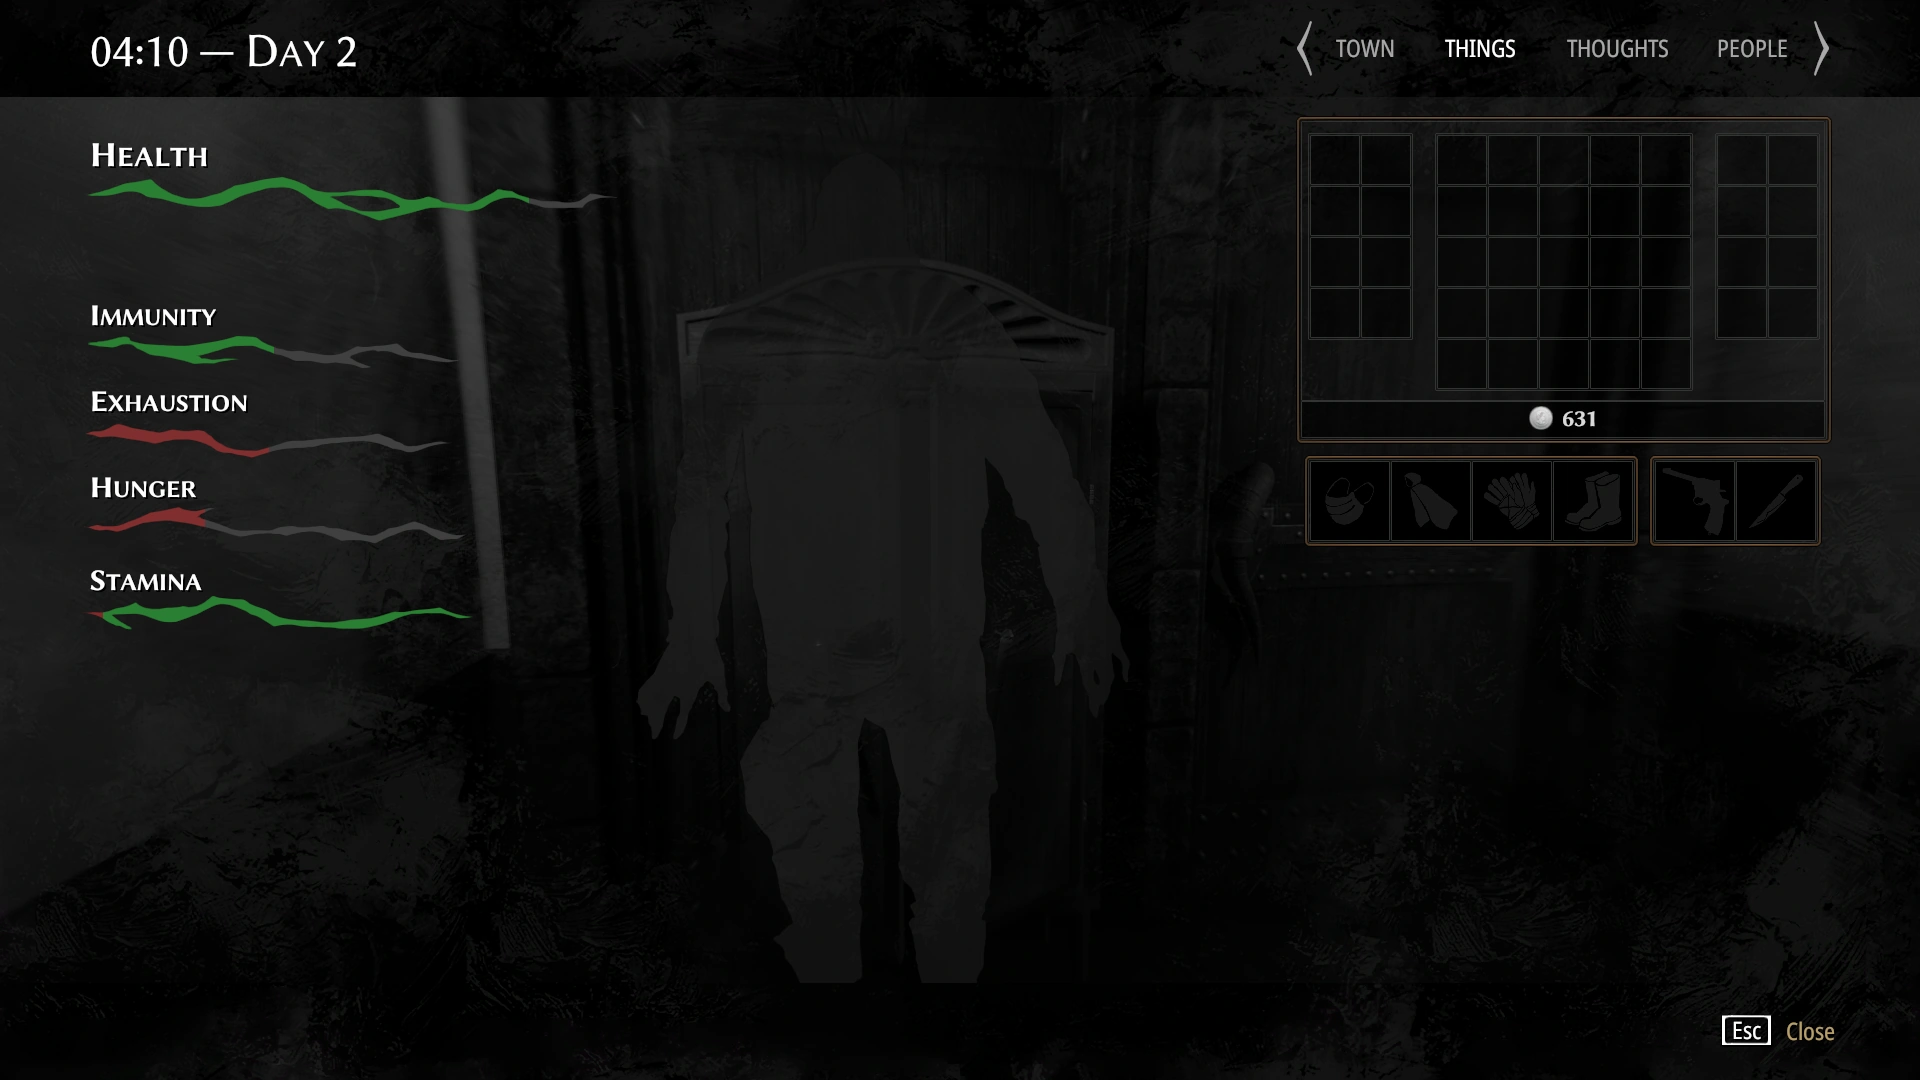
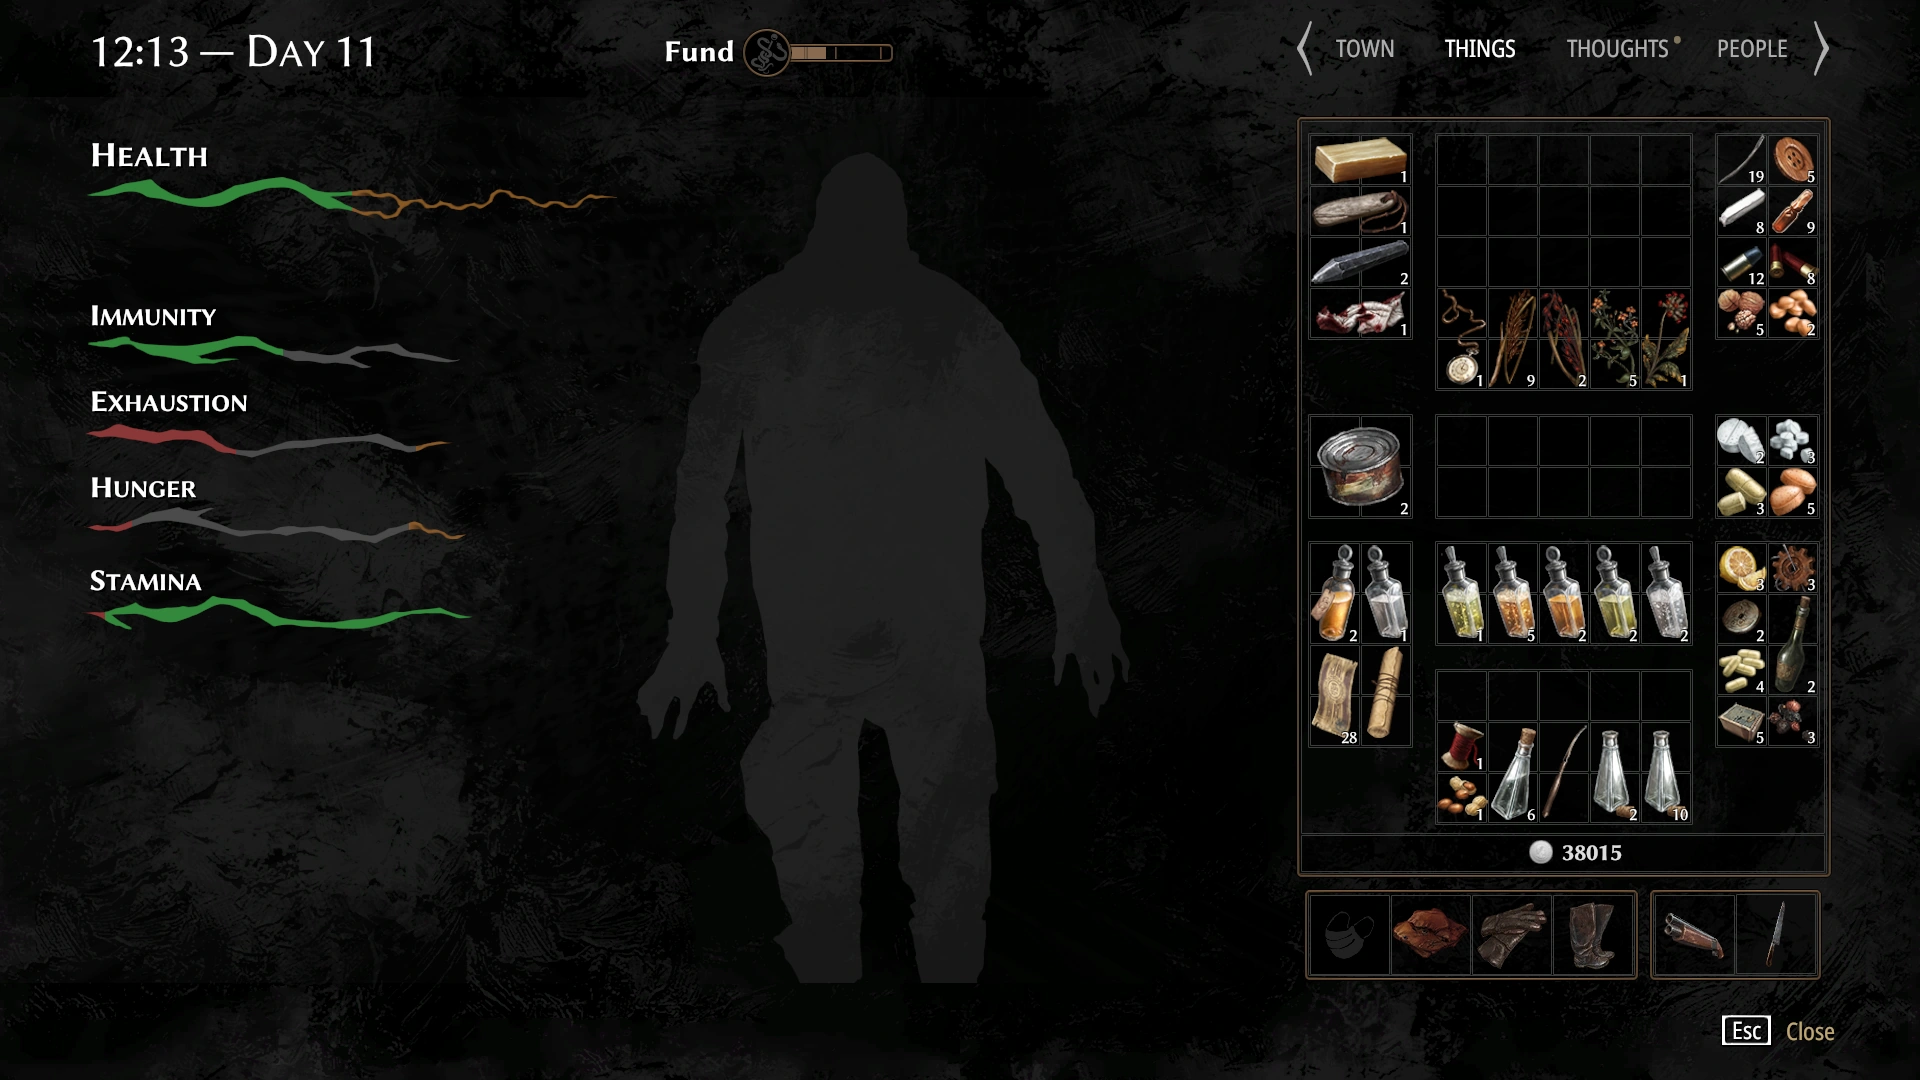
Player stats menu
Bodily Functions
Health
- The player's core stat. If it is depleted entirely, the player will die.
- Health is primarily lost during combat, however if the player's hunger or exhaustion are at their maximum limit, or the player has contracted Plague, their health will diminish incrementally. If already infected, interacting with infected surfaces, people, clouds, or air will result in additional loss of health. Health can also by lost by consuming certain rations (such as Coffee) and drugs (namely antibiotics).
- Health can be regained by using healing items such as Tourniquets and Bandages, or by sleeping (+25% HP/2 hrs). If the player consumes a Morphine or Painkiller prior to sleeping, the rate at which they recover health will increase. Damage received during combat can be mitigated by wearing clothing.
Immunity
- Immunity serves two purposes: Stopping the player from becoming infected, and reducing the rate at which infection grows (after infection has set in). Once immunity is depleted entirely, a visual haze will encroach upon the player's screen, signifying that infection is imminent. If the player continues to receive immunity damage, they will become infected with Plague. If this occurs, the immunity meter will be renamed "Infection", however both immunity and infection will be represented visually within said meter, in green and red respectively. If the player is infected, their immunity level determines the rate at which their infection increases passively: The higher their immunity, the slower the rate at which infection will grow. In turn, as infection expands, immunity's total capacity is limited, as is its potential for passive generation, which will always amount to half of immunity's remaining portion of the status meter.
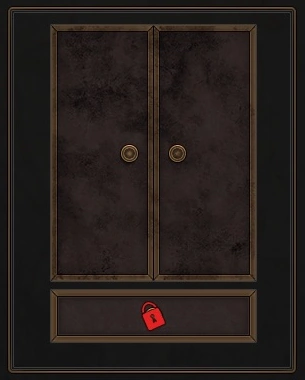
A cabinet featuring smudges on its top drawer, signifying that it is infected. Its bottom drawer is clean.
- Immunity is most commonly lost by being outside in infected districts, or interacting with infected surfaces, people, or plague clouds. When looting cabinets within infected houses, some drawers on the the looting interface will have black smudges on them, while others will be visibly clean: Opening smudged drawers will lower immunity, and occasionally spawn a rapid plague cloud animation (resulting in additional loss of immunity). Additionally, consuming Rotten Food and Muddy Water will reduce Immunity.
- Immunity can be increased by consuming Immunity Boosters, Twyrine, or Tinctures. If the player consumes home-brewed Antibiotics or Painkillers made with a kidney, their immunity will raise by a small amount. In addition to mitigating combat damage, clothes will also minimize negative impacts on immunity. As long as the player is not outside in an infected district, and their immunity is below 50% of its current capacity, their immunity will passively recover to its midway point. If starting from 0% immunity, and the player is uninfected, it will take approximately 3.25 in-game hours to reach 50% immunity.
Infection
- Infection represents the player's level of sickness. As stated above, once infected, the meter titled "Immunity" will be renamed "Infection", which is represented by a red portion that will grow from the meter's left side. Severity of infection determines its rate of growth and level of passive health loss, both of which increase exponentially. Infection level also inherently reduces Immunity's maximum capacity for passive recovery. If Immunity is fully depleted, interacting with infected surfaces, people, clouds, or air will result in rapid growth in infection.
- Infection cannot be fully removed without the use of a cure, however it can be managed via antibiotics (which come with considerable health loss) and maintaining a high level of Immunity (which will reduce rate of Infection growth).
Exhaustion
- So long as the player is awake, their Exhaustion will passively increase. If their Exhaustion meter is maxed out, their health will diminish incrementally.
- The most straight forward way to reduce exhaustion is to sleep (-20% Exh./1 hr). The Haruspex is able to sleep at the Haruspex's Lair, Shelter, Willows, Peter Stamatin's Loft, Lump and, if the correct quest is completed, the Stillwater. Lemons and Coffee can be eaten to decrease exhaustion, however Coffee will also negatively affect player health and hunger. "Medrel" Tinctures (+) slightly reduce exhaustion, as do Antibiotics and Painkillers made with Brains or Livers. It takes approximately 16.5 in-game hours for the exhaustion meter to deplete entirely, and 5 hours spent sleeping to recover it entirely.
Hunger
- Hunger constantly increases throughout gameplay, however its rate of growth is reduced by 60% when sleeping. Like exhaustion, if hunger reaches its maximum capacity, player health will diminish incrementally.
- Hunger is decreased by consuming rations, most of which increase thirst in turn. "Yas" Tinctures (+) slightly reduce hunger, as do Antibiotics and Painkillers made with Hearts. It takes approximately 6.5 in-game hours for the hunger meter to deplete entirely.
Stamina/Thirst
- Stamina and Thirst are represented within the same meter in green and red respectively, and have a relationship similar to immunity and infection, in that stamina's room for expansion is limited by thirst's growth. Stamina is temporarily drained while running, jumping, and fighting. Running increases the player's movement speed by 70%. Whenever stamina recovers from these losses, thirst will grow in turn, thus reducing stamina's total capacity. The smaller the player's stamina, the more of a disadvantage they'll have when next they need to fight or run. Thirst cannot expand beyond ~66% of the status meter's total capacity.
- Be mindful of how low the stamina meter depletes: If it enters the bottom 15% of its current value, performance while fighting or running will temporarily worsen, and thirst's rate of growth will increase. The player character will also begin to breathe heavily, their vision will blur, and the Stamina/Thirst meter's title turn red.
- So long as the player character is in combat, Stamina can be recovered rapidly by blocking (combat status is always accompanied by coinciding combat music). This can help turn around fights that would otherwise be lost, as it both reduces incoming damage and allows the player to compose before their return volley. Outside of combat, the blocking animation loses this recovery buff, however it will become available if ever enemies are in pursuit, meaning you do not need to actively engage them before reaping the benefits.
- Due to a bug, should the player go to sleep while their Stamina is still recovering, their Thirst will expand at a much faster rate during sleep than it would otherwise. As such, it is advisable that Stamina is recovered entirely before sleeping.
- Thirst is decreased most commonly by drinking water, but can also be reduced by consuming Milk , Tan, or Apples. "Zürkh" Tinctures (+) reduce thirst, as do Antibiotics and Painkillers made with Blood. If necessary, thirst can be recovered by drinking Muddy Water, at the expense of immunity.
Other Factors
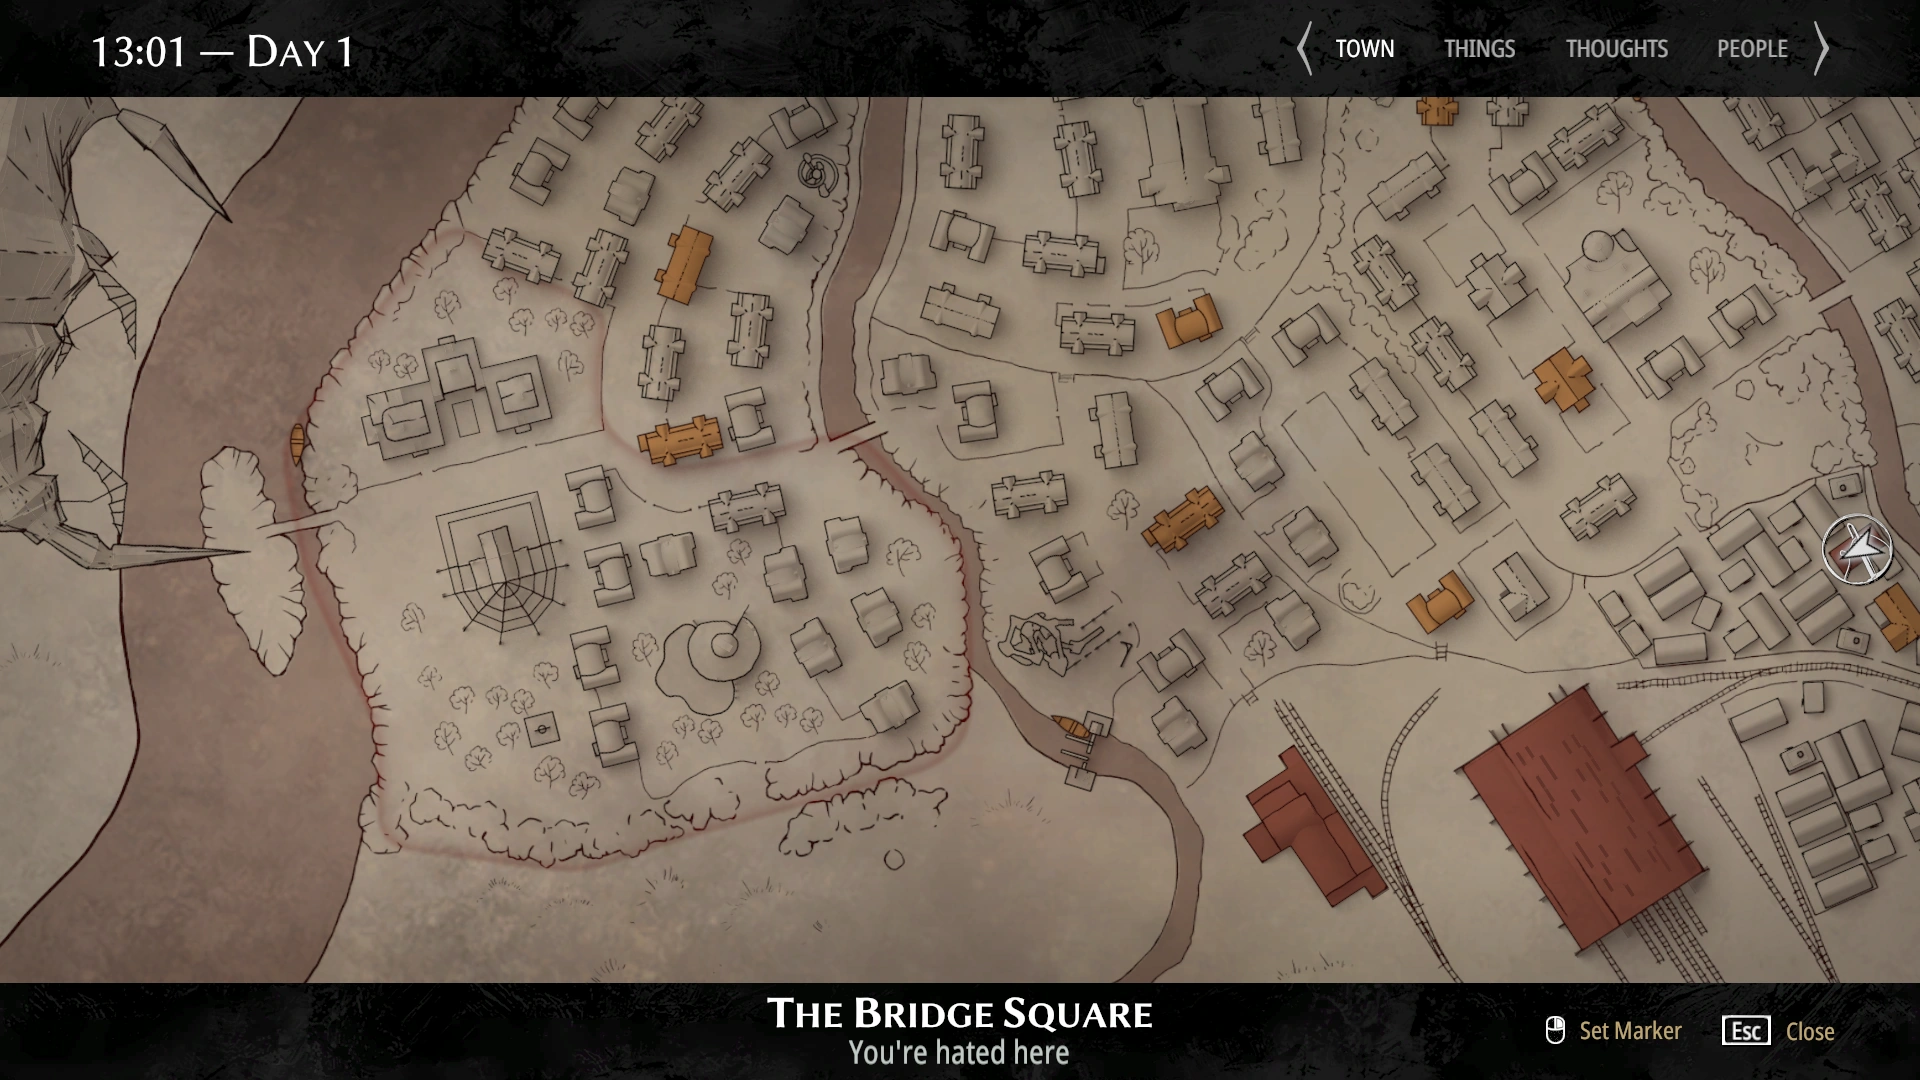

The game's map showing that the player is hated in the Bridge Square district.
Reputation
- The level of respect the townsfolk have for the player. Reputation in Pathologic 2 is determined per district, and an action's magnitude decides the severity and proximity of the ensuing punishment. Some actions (such as stealing) will only affect reputation for the current district, while others (such as attacking NPCs) will also impact neighboring districts. There are 4 levels of reputation that districts can exhibit:
- >75%: You're Respected Here
- >40%: No One Cares About You
- >25%: You're Unwelcome Here
- >0%: You're Hated Here
| Actions That Impact Reputation | |||
|---|---|---|---|
| Negative Actions | Witness | Affects Nearby Districts | |
| Yes | No | ||
| Theft (Per Item Taken) | -4% | -1% | No |
| Lockpicking a Door | -6% | -3% | No |
| Lockpicking a Drawer | -3% | -1% | No |
| Looting Dead Townsfolk (Per Item) | -2% | -1% | No |
| Mugging Townsfolk | -6% | -6% | Yes |
| Mugging Infected Townsfolk | -4% | -4% | No |
| Attacking Townsfolk | -5% | -5% | Yes |
| Attacking Infected Townsfolk | -3% | -3% | No |
| Shooting Townsfolk | -20% | -20% | Yes |
| Shooting Infected Townsfolk | -15% | -15% | No |
| Murdering Townsfolk | -50% | -20% | Yes |
| Murdering Infected Townsfolk | -30% | -15% | No |
| Murdering Infected "Rags" Townsfolk | -5% | -3% | No |
| Autopsy on a Healthy Body | -10% | -2% | Yes |
| Autopsy on an Infected Body | -4% | -2% | No |
| Positive Actions | Witness | Affects Nearby Districts | |
| Yes | No | ||
| Bartering At a Loss w/ Townsfolk* | +0.5% | +0.5% | No |
| Bartering At a Loss w/ Infected Townsfolk* | +0.25% | +0.25% | No |
| Repairing Water Pumps | +10% | +10% | No |
| Murdering a Bandit | +3% | +1% | No |
| Treating NPC Infection | +10% | +10% | Yes |
| Curing NPC Infection | +50% | +50% | Yes |
| Treating Bound Character's Infection | +20% | +20% | Yes |
| Curing Bound Character's Infection | +80% | +80% | Yes |
| |||
- If the player is deemed Unwelcome within a district, they are denied the right to stores and trading with adults. If they are considered Hated, then local Militia will openly attack them in the street. Aside from these negative consequences, districts' collective reputation statuses contribute toward each day's starting fund progress, details of which can be read below.
- In most cases, if a NPC bears witness to the player committing a crime, its ensuing negative impact on reputation will be worse. Adult and teenage male witnesses will often attack the player in response to crimes observed, however women and children will run away.
- Whenever a district becomes infected, its reputation will revert to 40%, which is the bottom end of No One Cares About You.
- Curiously, harsh crimes committed in the Maw district do not affect player reputation in neighboring districts.
- The following districts do not have a reputation status, and therefore cannot judge the player character for crimes committed: The Station, the Warehouses, the Factory, and the Cape. As well, the Steppe and its associated locations (such as the Cemetery) are free of the reputation system. Crimes such as autopsy and murder can be exercised with impunity so long as they occur on neutral territory. Innocent NPCs can also be lured away from reputation districts with this in mind, and otherwise shot at range with firearms provided the player shoots them from neutral ground.
Time
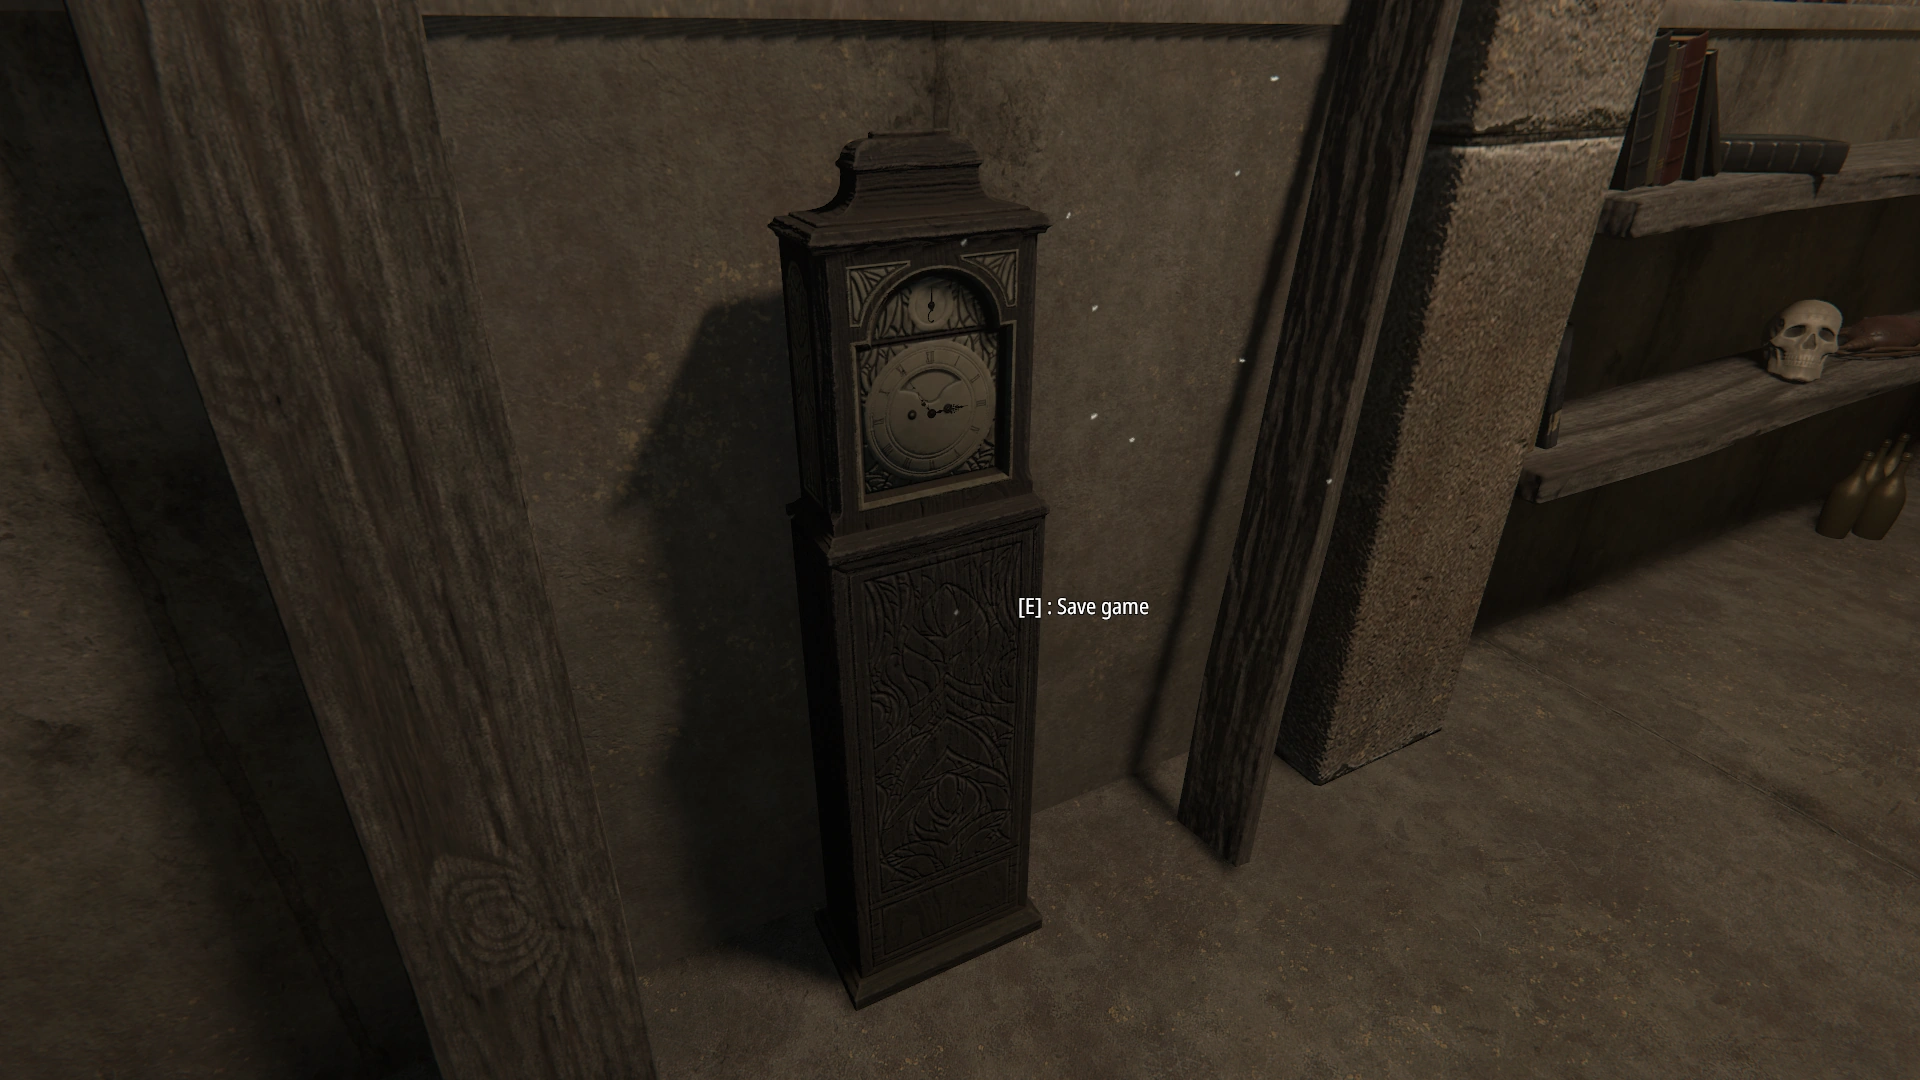
A clock in the Haruspex's Lair
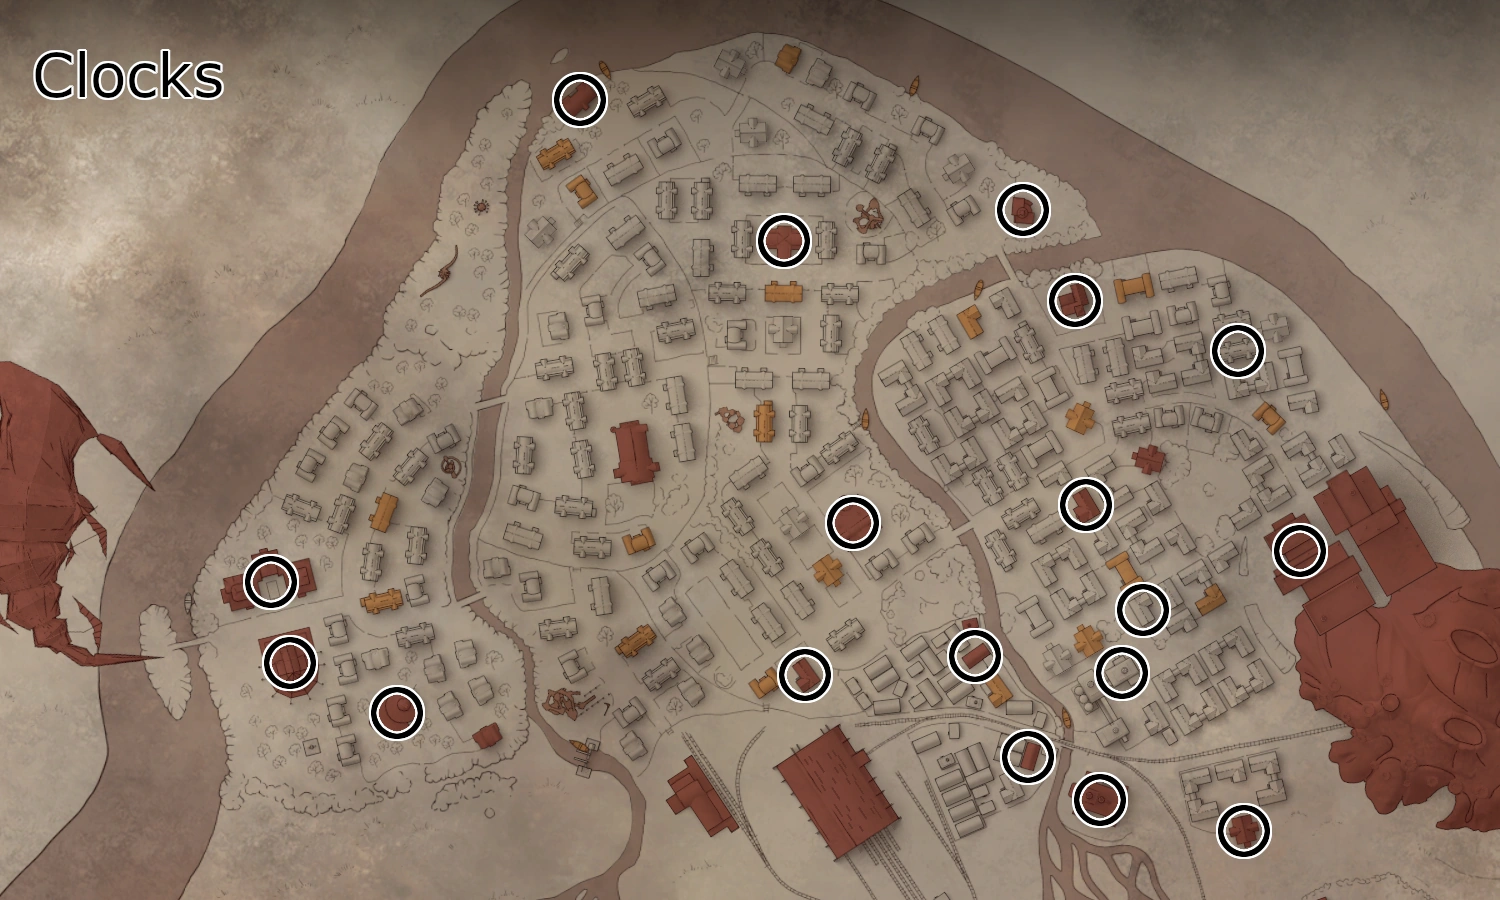

A map of all save clock locations in Pathologic 2

Map view clock icon
- In Pathologic 2, there are no auto-saves outside of the Prologue (and at the start of the Abattoir). The only way to save the game is to do so at a clock. Clocks can be found in most major buildings such as Bound Character homes and the Town Hall. Hovering over buildings from map view will reveal whether they have a clock available via an icon that resembles a clock (similar icons appear for locations with a beds, storage containers, and stores).
Progression
- As the game progresses, time will move faster: Each new day at dawn (07:30), time's progression is increased slightly, wherein the following 24-hours in-game will be 4 minutes shorter in real-time. On Day 1, 1 hour in-game lasts 4 minutes real time (24 in-game hrs:100 IRL minutes). By Day 11, 1 hour in-game lasts 2 minutes & 30 seconds real time (24 in-game hrs:60 IRL minutes).
- Time stops during dialogue and within most menu screens (such as trade, diagnosis, and autopsy), however it does not stop while looting or while using the Alembic or Brewery.
| Daily 24-Hr Cycles | |
|---|---|
| Dawn | IRL Minutes |
| 1 | 100 |
| 2 | 96 |
| 3 | 92 |
| 4 | 88 |
| 5 | 84 |
| 6 | 80 |
| 7 | 76 |
| 8 | 72 |
| 9 | 68 |
| 10 | 64 |
| 11 | 60 |
Quest availability
- Some quests last only one day, and others several. There is no way to know which is which without experience, so it is best that the player do all that they can with the time they have.
Midnight
- Most notably, midnight marks the deadline for tending to any Bound who are in danger or infected. New districts will become infected for the day, and those that were previously infected will become burned. The Theatre will open for the night, as will the Dead Item Shop. Midnight will also prompt children to go home for the night, and bandits to appear in turn. Stores' inventories will refresh, store prices will increase, trash bins' inventories will refresh, and dropped items contained within cloth sacks will despawn from the game. Herbs found in the Shekhen garden plots will respawn.
Dawn
- At 07:30, the player will typically receive new quest markers, observe cutscenes, and/or receive scripted messengers that are relevant to the new day. Both the Theatre and Dead Item Shop close for the night. Dawn is also when all herbs respawn (including Shekhen's, for a second time), Children's Caches refresh, and trash bins' inventories refresh again. Bandits will disperse and children will return outdoors. As already stated, dawn marks a subtle increase in time's progression.
Equipment
Clothing
- Clothes can be purchased in Tailors and otherwise looted from certain houses and bodies. Clothes can be equipped in four slots: Head, Torso, Hands and Feet. Quality and type of clothing determines the degree to which the player is protected from combat, fire, and plague. Each clothing category excels in defending against one of the four major plague threats, which are as follows:
- Masks protect from plague clouds
- Cloaks protect from contacts with diseased people
- Gloves protect from infected surfaces
- Footwear provide great protection from passive infection in infected districts
- Clothing items lose durability whenever taking physical- or plague-based damage.
- As mentioned below, cloaks are essential items for upgrading the Haruspex's inventory capacity.
Weapons
- There are two slots for Weapons: one for firearms, and one for melee weapons. Firearms are powerful, however their bullets and repair items are both relatively costly. Conversely, melee weapons' upkeep is less expensive, but they require close range engagements. Some melee weapons can also serve as surgical tools for autopsy, while others can pick locks. With each use of a weapon (including autopsy), its durability will lower.
Repair
Repair UI
- As equipped items' durability degrades, their performance will worsen. Melee weapons will do less damage, firearms will jam, and if allowed to reach 0%, clothing items will be destroyed entirely. To avoid this, they must be repaired periodically, either by using the workbench in the Haruspex's Lair or by interacting with certain Townsfolk, the details of which can be seen in the Men and Women sections. Note that cloaks can be used for upgrades made to the Haruspex's inventory regardless of their condition.
- Durability is divided into tiers, which determine the cost of repair. Each repair tier will require more to ascend to the next one, so it is advisable to keep items maintained at their highest durability. As an example, below is a table demonstrating that the worse a Scalpel's durability becomes, the more its cost of maintenance will compound.
| Durability |  Grindstone |
 Chisel |
 Straight Razor |
|---|---|---|---|
| >70% | 1 | ||
| >35% | 1 | 1 | |
| >0% | 1 | 1 | 1 |
- Commonly used repair items can be found on the Other Items page. Water Pumps can also be repaired for a 10% boost to local reputation.
Inventory
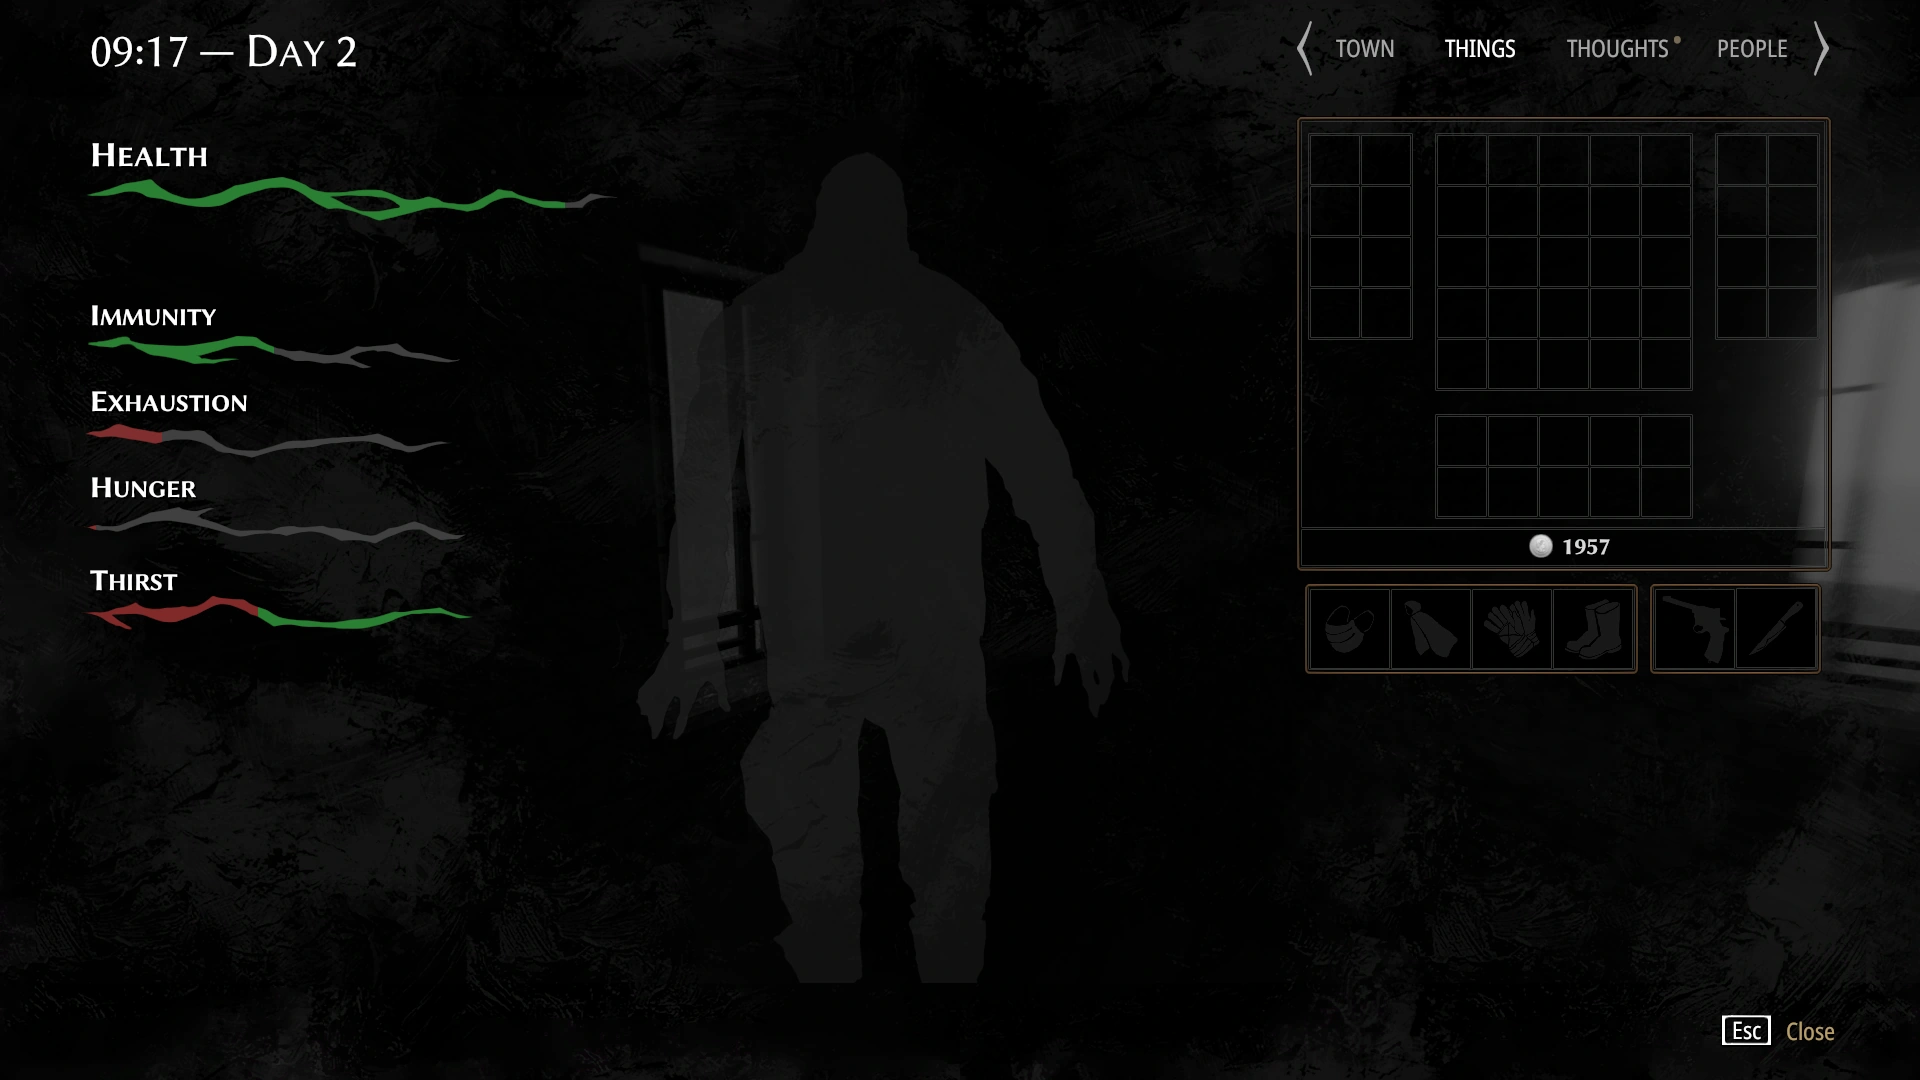
- In Pathologic 2, each item occupies a given number of cells in a grid, which serves to represent containers. At the start of the game, the Haruspex's inventory is limited to two 2x4 grids and a bigger 5x5 one. As the game progresses, his inventory can be expanded so that he may carry more items at once.
- The first upgrade can be acquired as early as 07:30 on Day 2, by speaking to Aspity after Isidor Burakh's funeral in the Cemetery. It adds a 5x2 grid under the central one. Should the Haruspex miss this interaction with Aspity, a Worm will eventually deliver the upgrade to him.
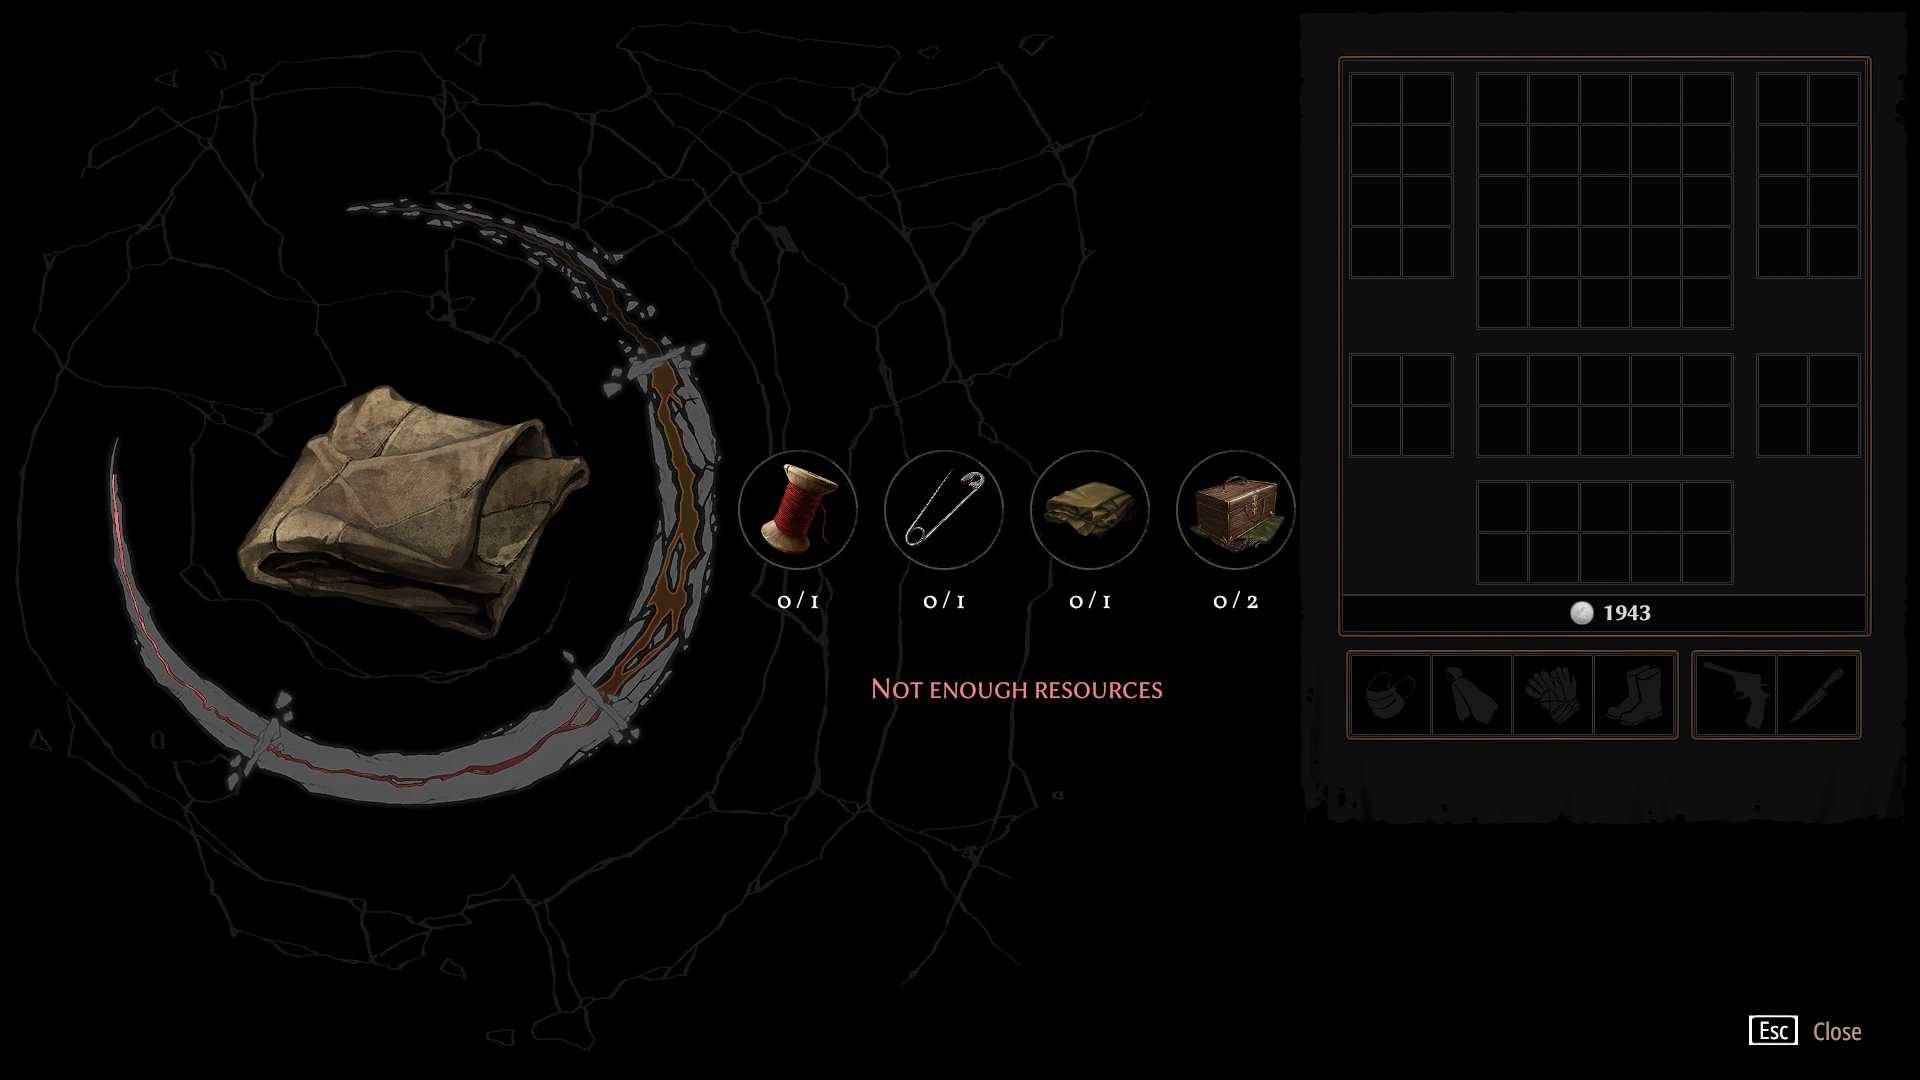
- The remaining four upgrades are made by using the workbench inside the Haruspex's Lair, which can be accessed later in Day 2. Each additional upgrade will require more valuable items than the last, some of which may not be available until certain points in the game.
| Haruspex Inventory Upgrade Requirements | +Space | |||||
|---|---|---|---|---|---|---|
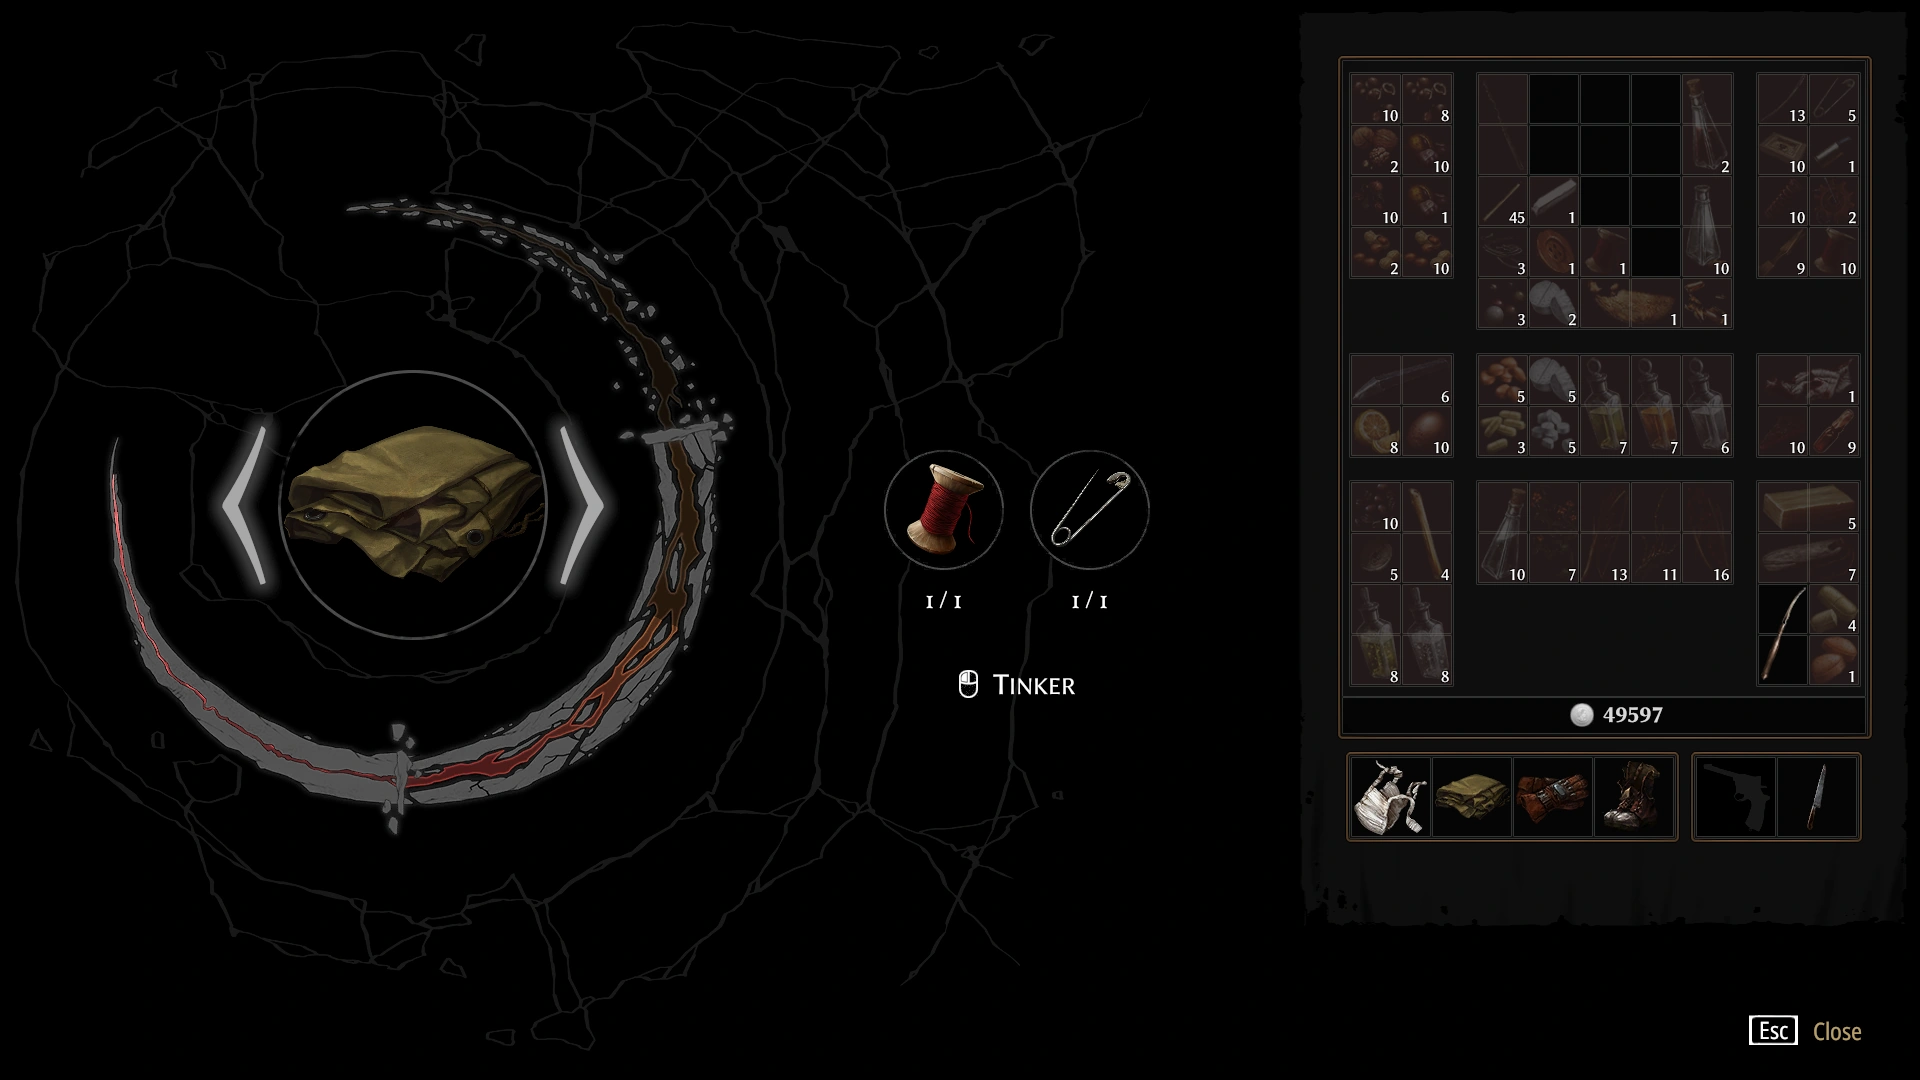
| 1st Upgrade |  Cloak |
 Thread |
 Needle |
+ 2x2 + 2x2 | ||
| 2nd Upgrade |  Repellent Cloak |
Thread |
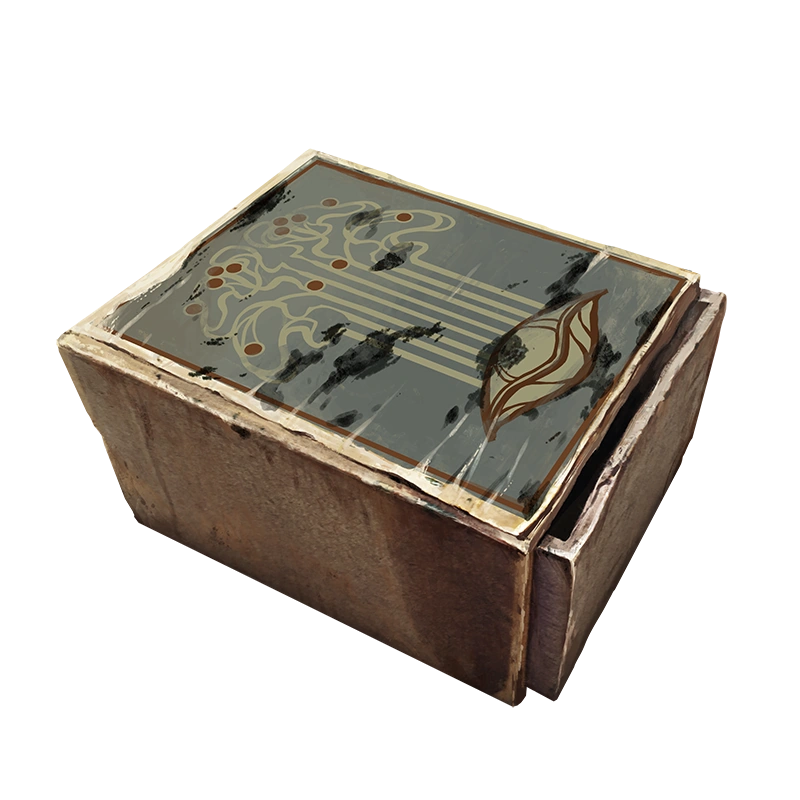
 Thimble |
 Sewing Box |
+ 5x2 | |
| 3rd Upgrade | Repellent Cloak |
Thread |
 Safety Pin |
Sewing Box |
Sewing Box |
+ 2x4 + 2x4 |
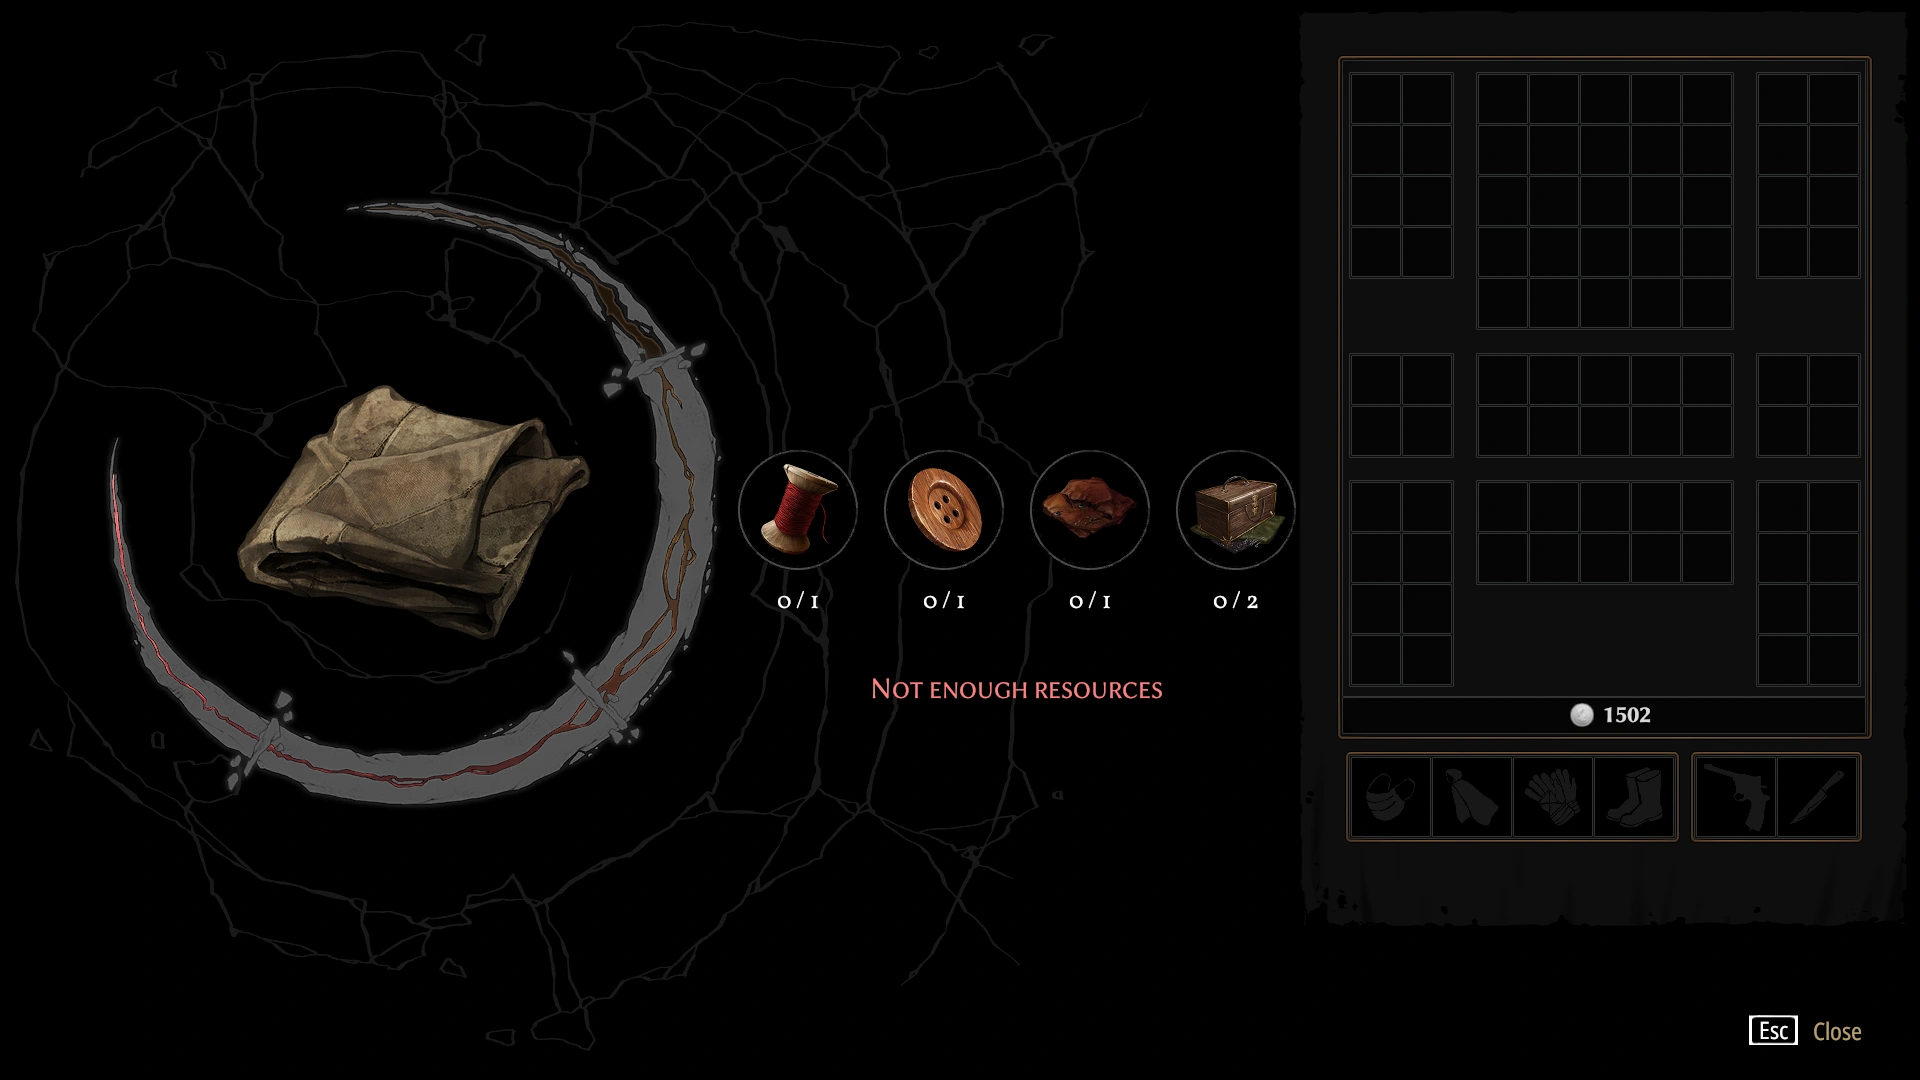
| 4th Upgrade |  Army Cloak |
Thread |
 Button |
Sewing Box |
Sewing Box |
+ 5x3 |
- Repellant Cloaks and Sewing Boxes are not available in Tailors until Day 4, and Army Cloaks become available in Tailors on Day 9. In very rare occurrences, cloaks can be looted from houses before their arrival date in stores.
Initial inventory grid
Inventory after speaking to Aspity on Day 2
Inventory after first workbench upgrade
Inventory after second workbench upgrade
Inventory after third workbench upgrade
Fully upgraded inventory

Trading
- The ability to trade is available from the beginning of the game. Trading with different townsfolk allows the player to obtain resources that may be difficult to obtain, if not otherwise impossible.
Combat
- The player receives a combat tutorial during the Prologue. Throughout the game, the player will have to choose between when they should fight and when they should run. Although most encounters can be solved without fighting, there may be situations where combat is unavoidable so the player should seek to familiarize themselves with the combat system.
- If ever the player has their fists or weapons raised, their running animation will be somewhat slowed.
Melee
- Regardless of whether the player is using their fists or a melee weapon, they have four basic options during melee combat: Light attacks, heavy attacks, stealth attacks, and blocks.
- Light attacks are performed by engaging the attack button (left click, or right trigger on controller) momentarily. Light fisted attacks can be blocked entirely, but melee weapons' light (and heavy) attacks pierce guards.
- Heavy attacks are performed by holding the attack button. Heavy attacks are slower and use more stamina, but can break opponents' guards, and temporarily stagger them. Successive heavy attacks can be queued behind current heavy attacks' animations, such that the following attack will release faster than normal. This is likely unintended.
- Stealth attacks require that the player sneak behind an opponent, then momentarily engage the attack button. These usually do slightly more damage than heavy attacks, and stagger opponents, however their damage worsens rapidly with weapon durability (if using a melee weapon).
- Blocks are performed by holding right-click (or left trigger). Blocking neutralizes opponents' light fist attacks, however their bladed attacks will still deal considerable damage. If the player maintains a block for an extended period, then opponents will deal a heavy attack, which will force the player into a stunned state for a short duration, during which they cannot attack or block, and they receive additional damage. If ever the player is stunned like this, the best course of action is running away from opponents, as their walking animation while stunned is too slow to evade follow up attacks. Blocking also recovers stamina rapidly, so long as one is in combat (which is made evident by combat music). Heavy attacks can be queued behind block animations, and will occur rapidly after the block has finished.
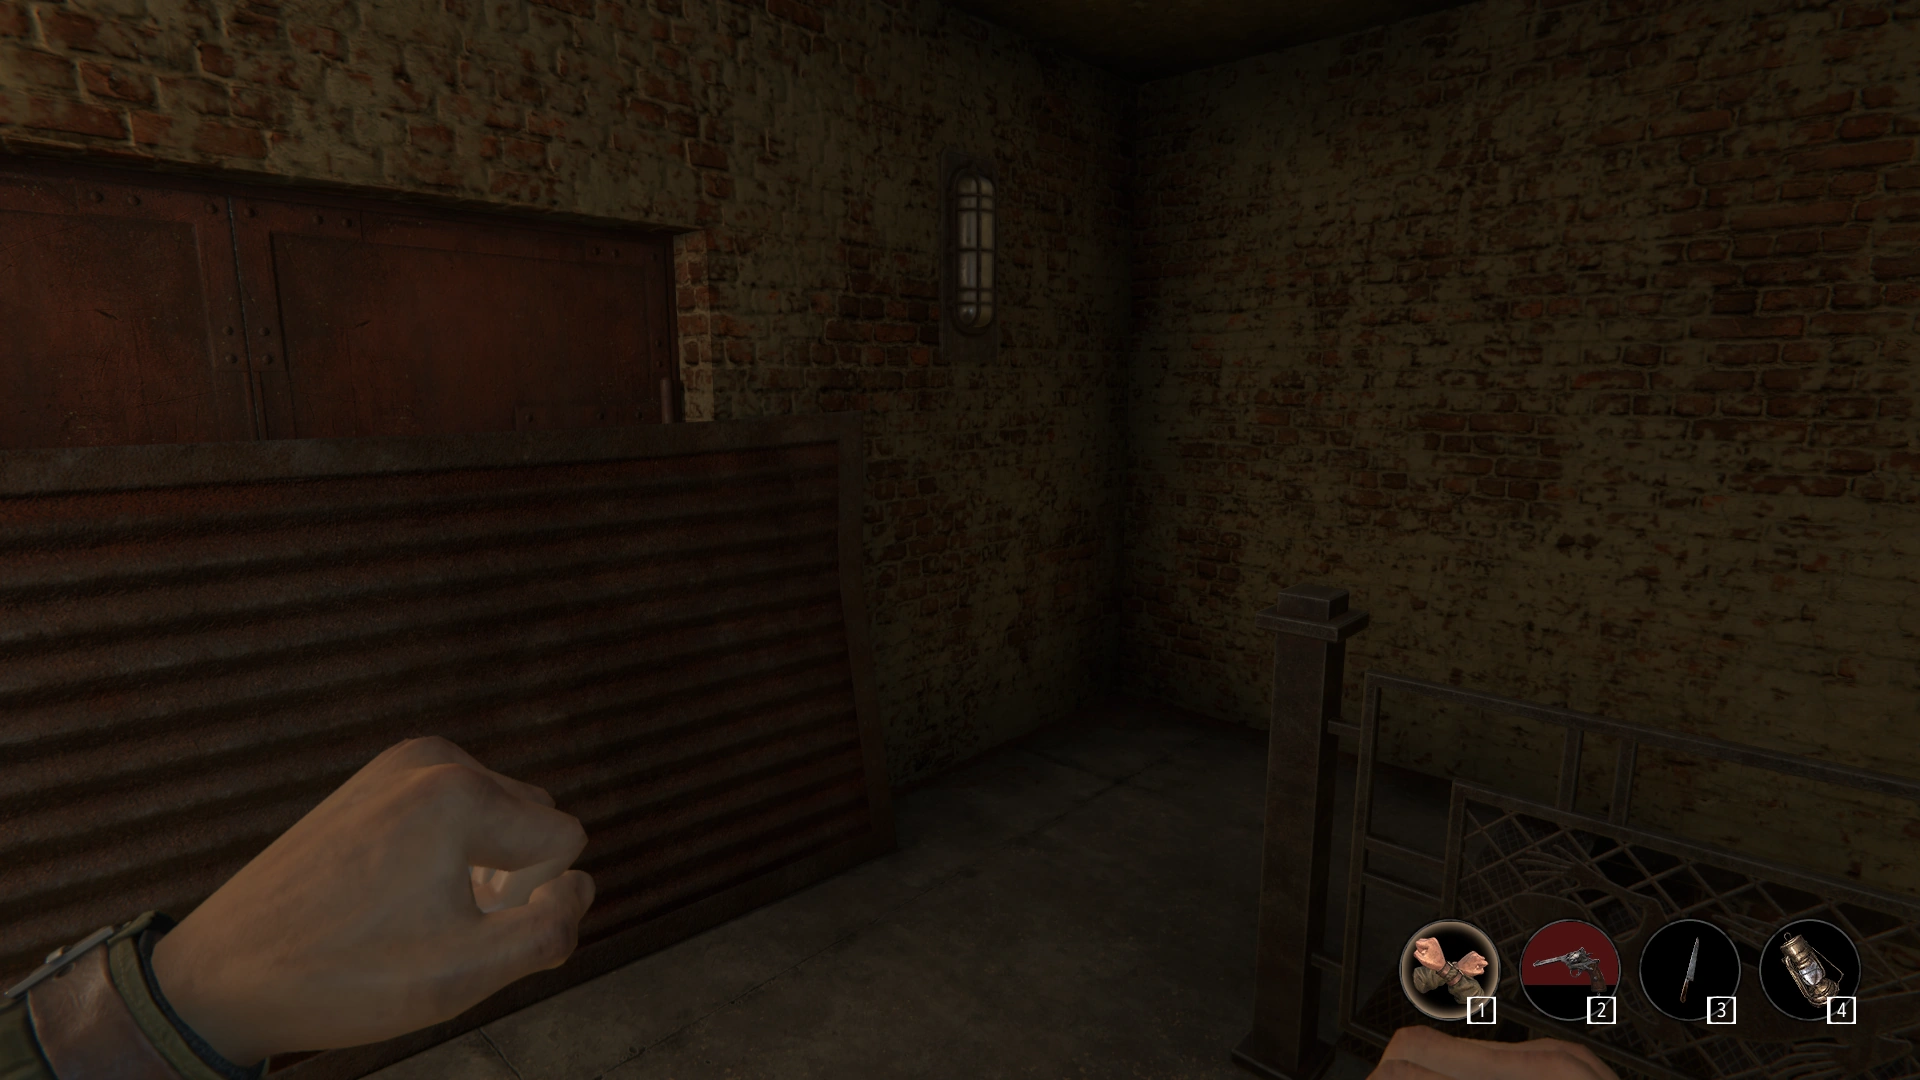
Fists
- As already mentioned, light fisted attacks can be blocked entirely, however heavy attacks will break through guards.
- Fisted light attacks deal 20 damage.
- Fisted heavy attacks deal 30 damage.
- Fisted stealth attacks deal 40 damage.
Blades
- As already mentioned, all bladed attacks pierce through guards to some degree, and their stealth attacks suffer more than others when weapon durability is low. All melee weapons deal twice as much damage (or more) as fist attacks. As melee weapons' durability degrades, so will their damage. Lockpicks are unique, in that their durability degrades rapidly, but once a lockpick breaks, it will kill its target instantly unless they are blocking or dodging.
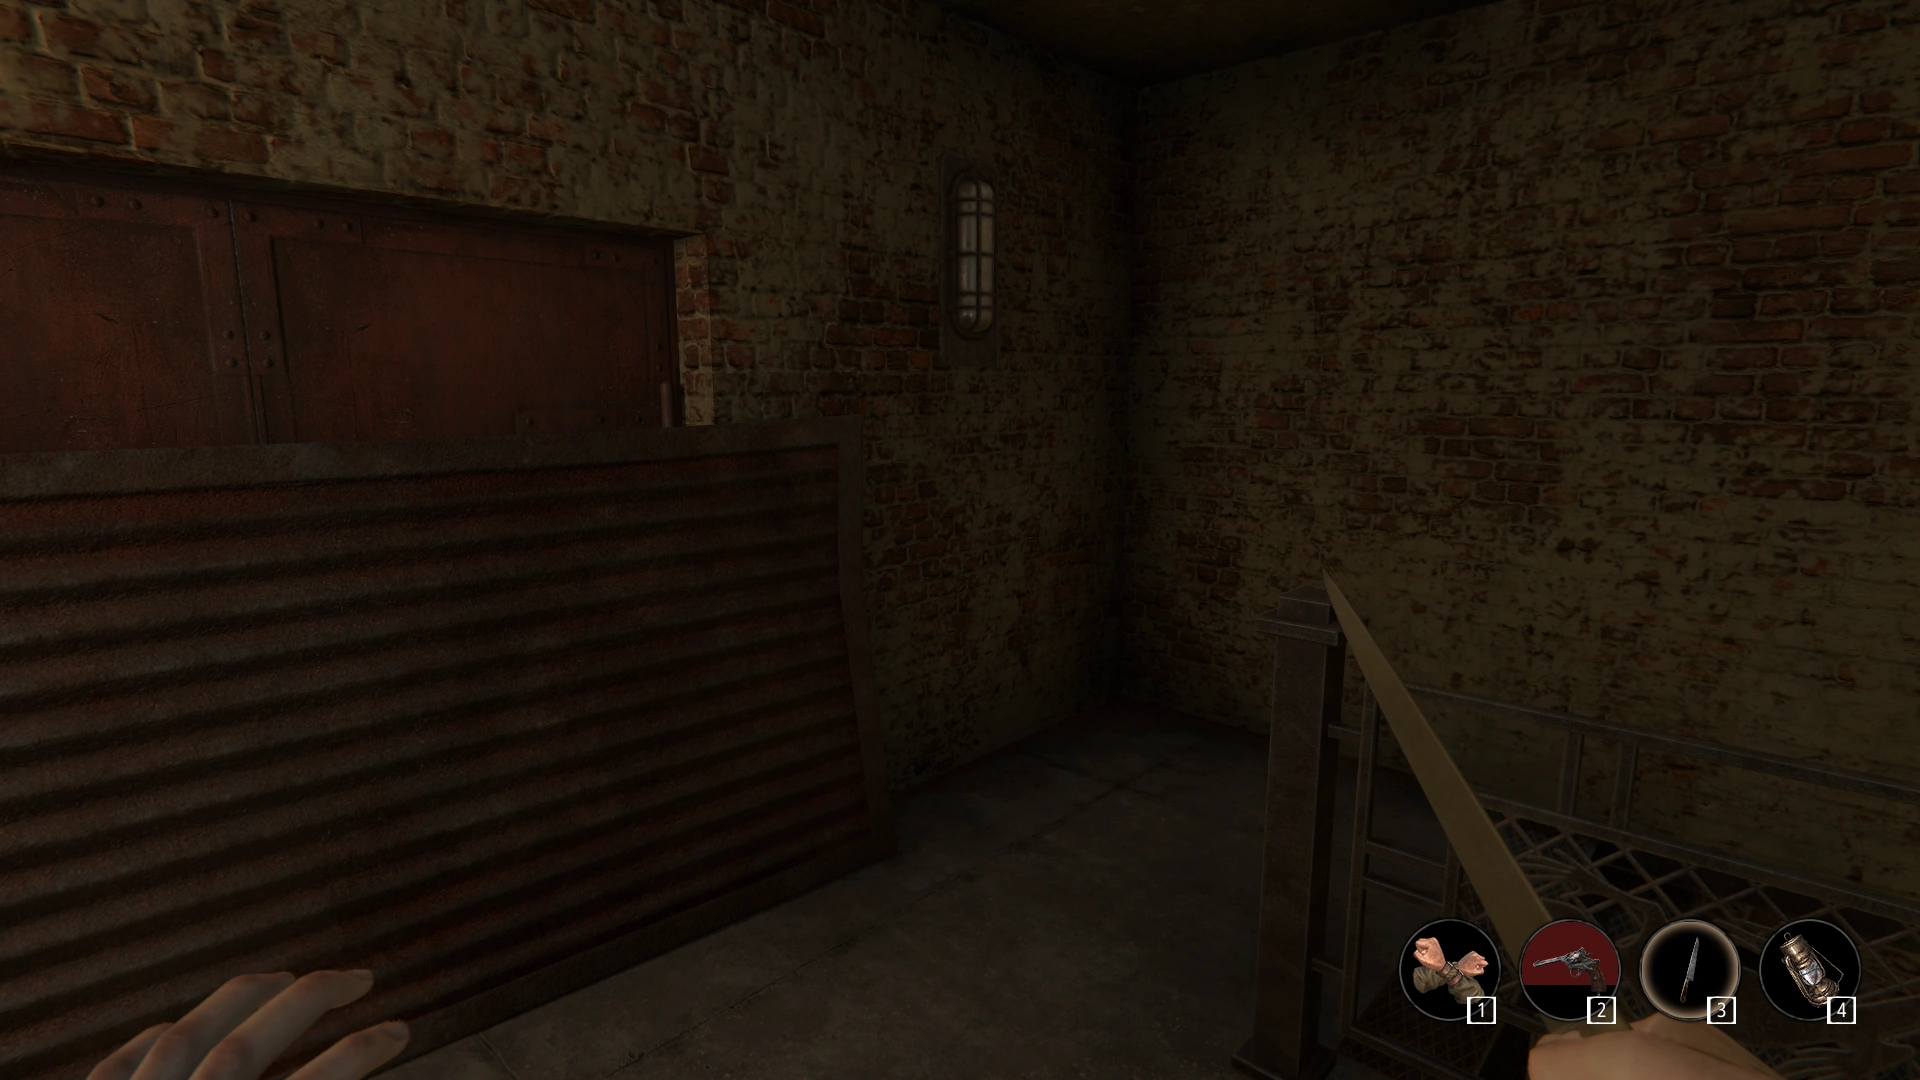
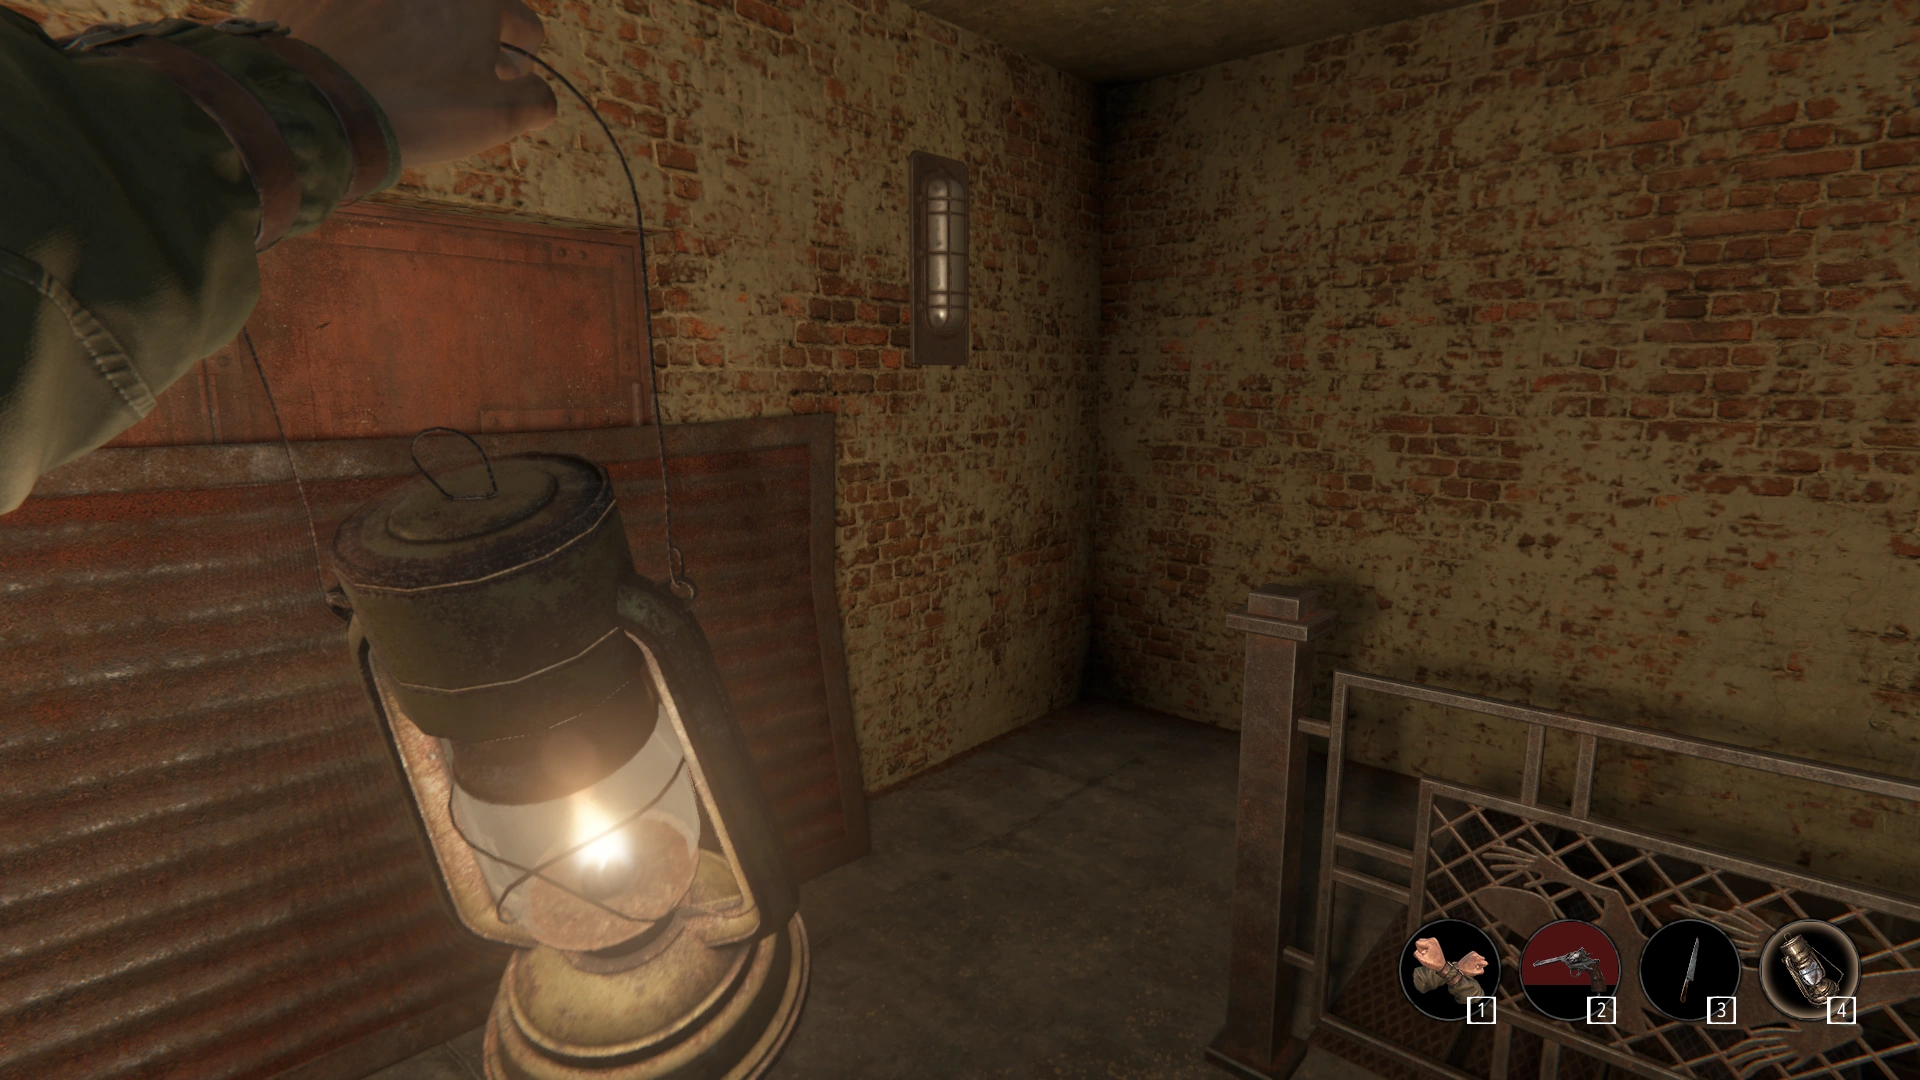
Oil Lamp
- The Oil Lamp does not take up space within the player's inventory and is not a traditional weapon, but it can be used in combat. Unlike the afforementioned melee options, it only features a light attack, which deals 20 damage. Otherwise if the player has matches in their inventory, they can light the lamp when it is equipped. This can aid player vision, and otherwise dispel static Plague clouds.
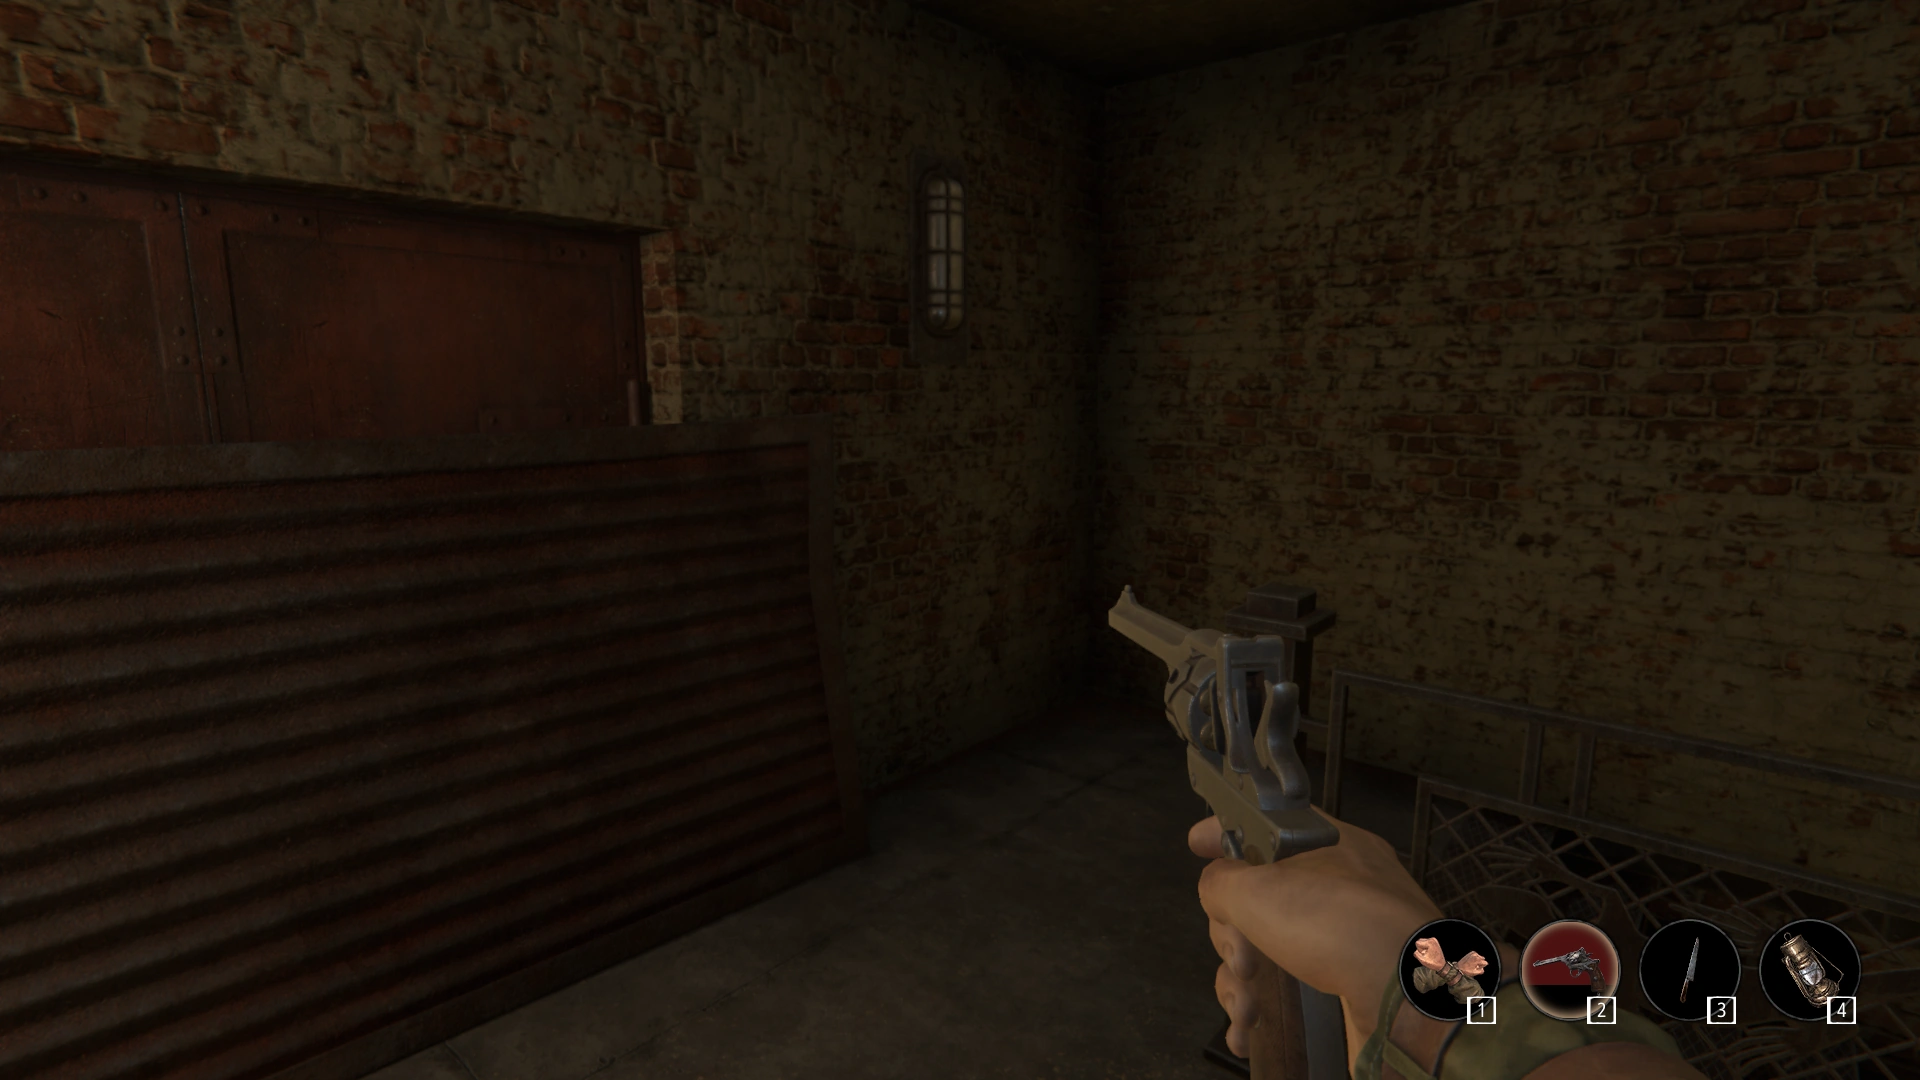
Firearms
- Firearms have just two options: Shooting (left-click, or right trigger) while aiming down sights (right-click, or left trigger), and shooting from the hip. Aiming down sights improves accuracy, however the damage remains the same in either case. Headshots deal 50-100% more damage, depending on the weapon used. All firearms require their corresponding ammo. As firearms' durability degrades, their accuracy worsens, and chances to misfire increase (which results in a punishingly long animation).
Lockpicking


Lockpicking UI
- When the player has a lockpick in their inventory, they will have the option to attempt to unlock locked doors they come across. When picking a lock, the needles on both sides must be aligned with their respective red sections in order for the door to open. By default left and right click (or trigger, if using a controller) will lift the corresponding side. Each click will damage lockpick durability: it is therefore preferable to try to reach the red at the same time on both sides, rather than "floating" one side while the other catches up. Black portions of the meters slow the needles' movement when going up or down.
Menkhu Knowledge
- See Menkhu Knowledge
- As a Menkhu the Haruspex is able to to find Herbs, create Tinctures and Painkillers, diagnose patients and prescribe Antibiotics, boost immunity and decrease pain. These mechanics are collectively known as "Menkhu Knowledge".
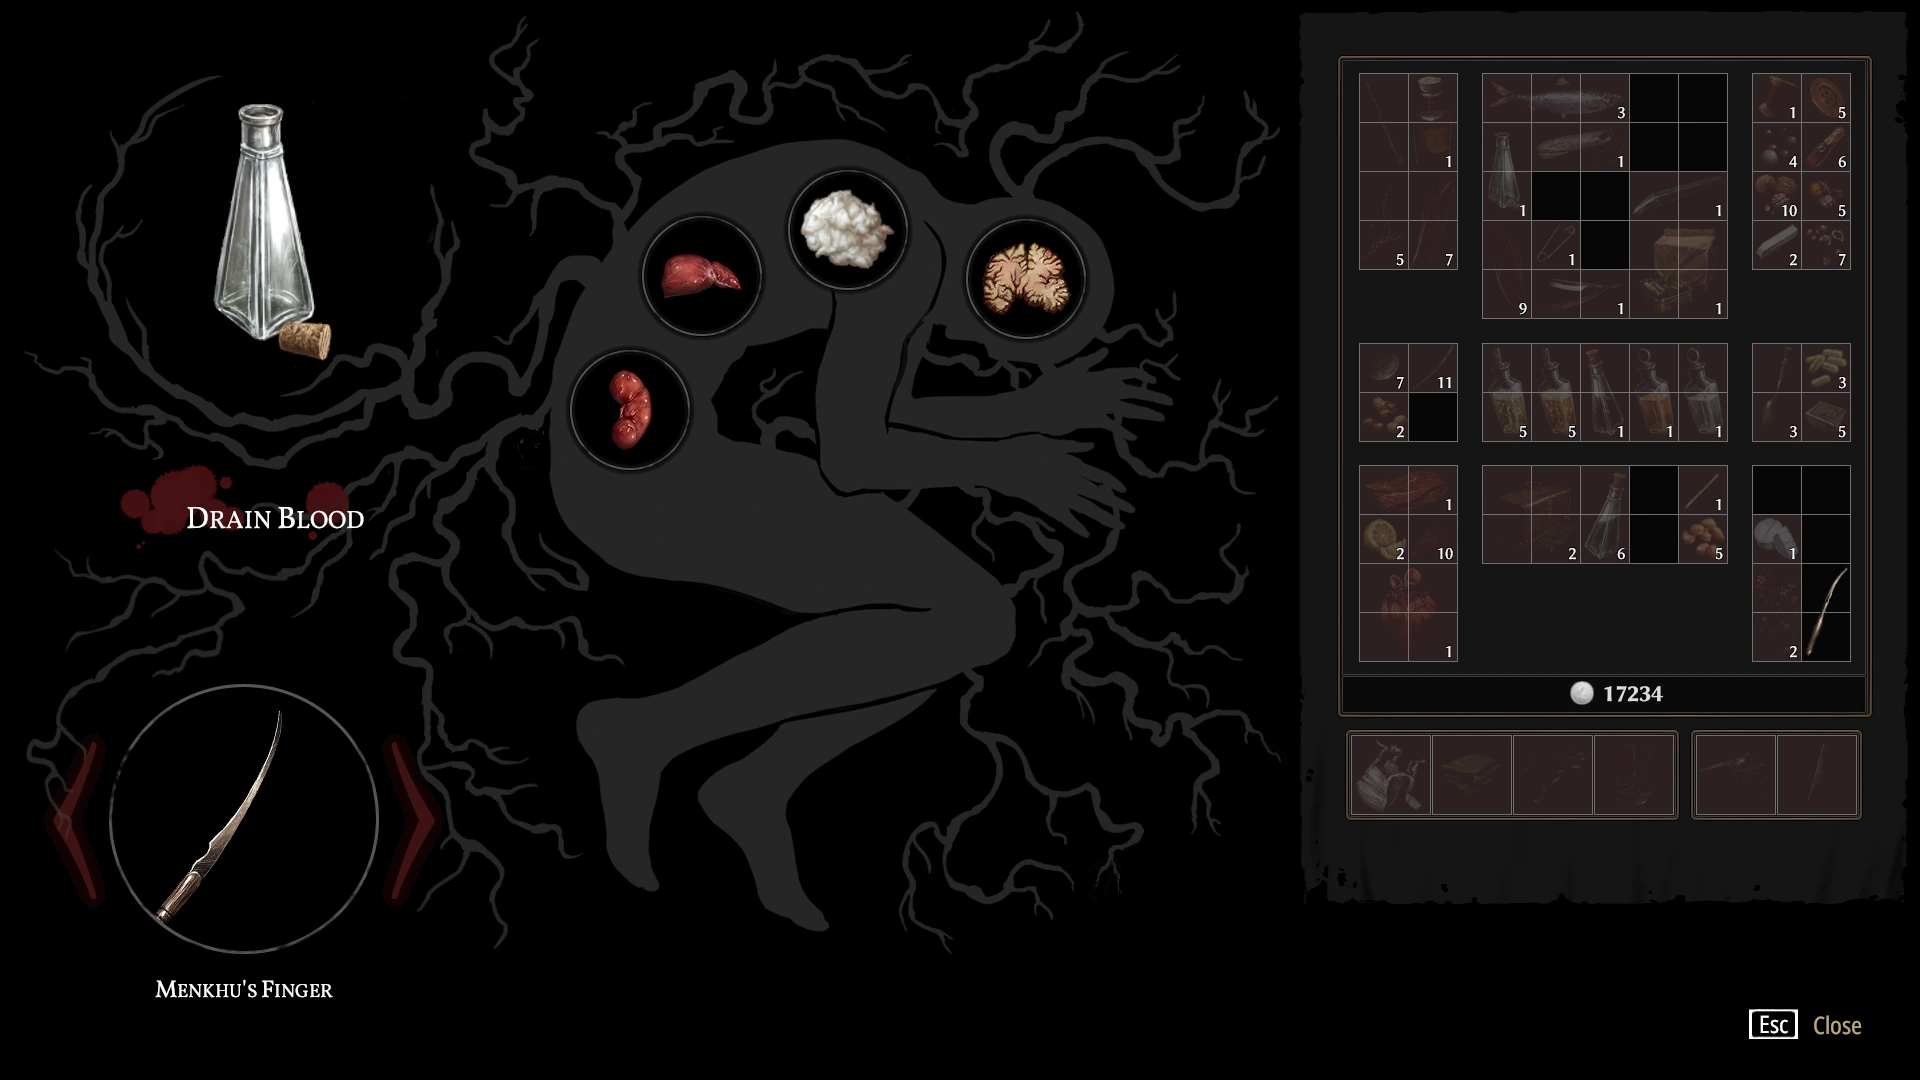
Autopsy
- As a Menkhu the Haruspex is able to autopsy corpses and collect organs, both health and infected.
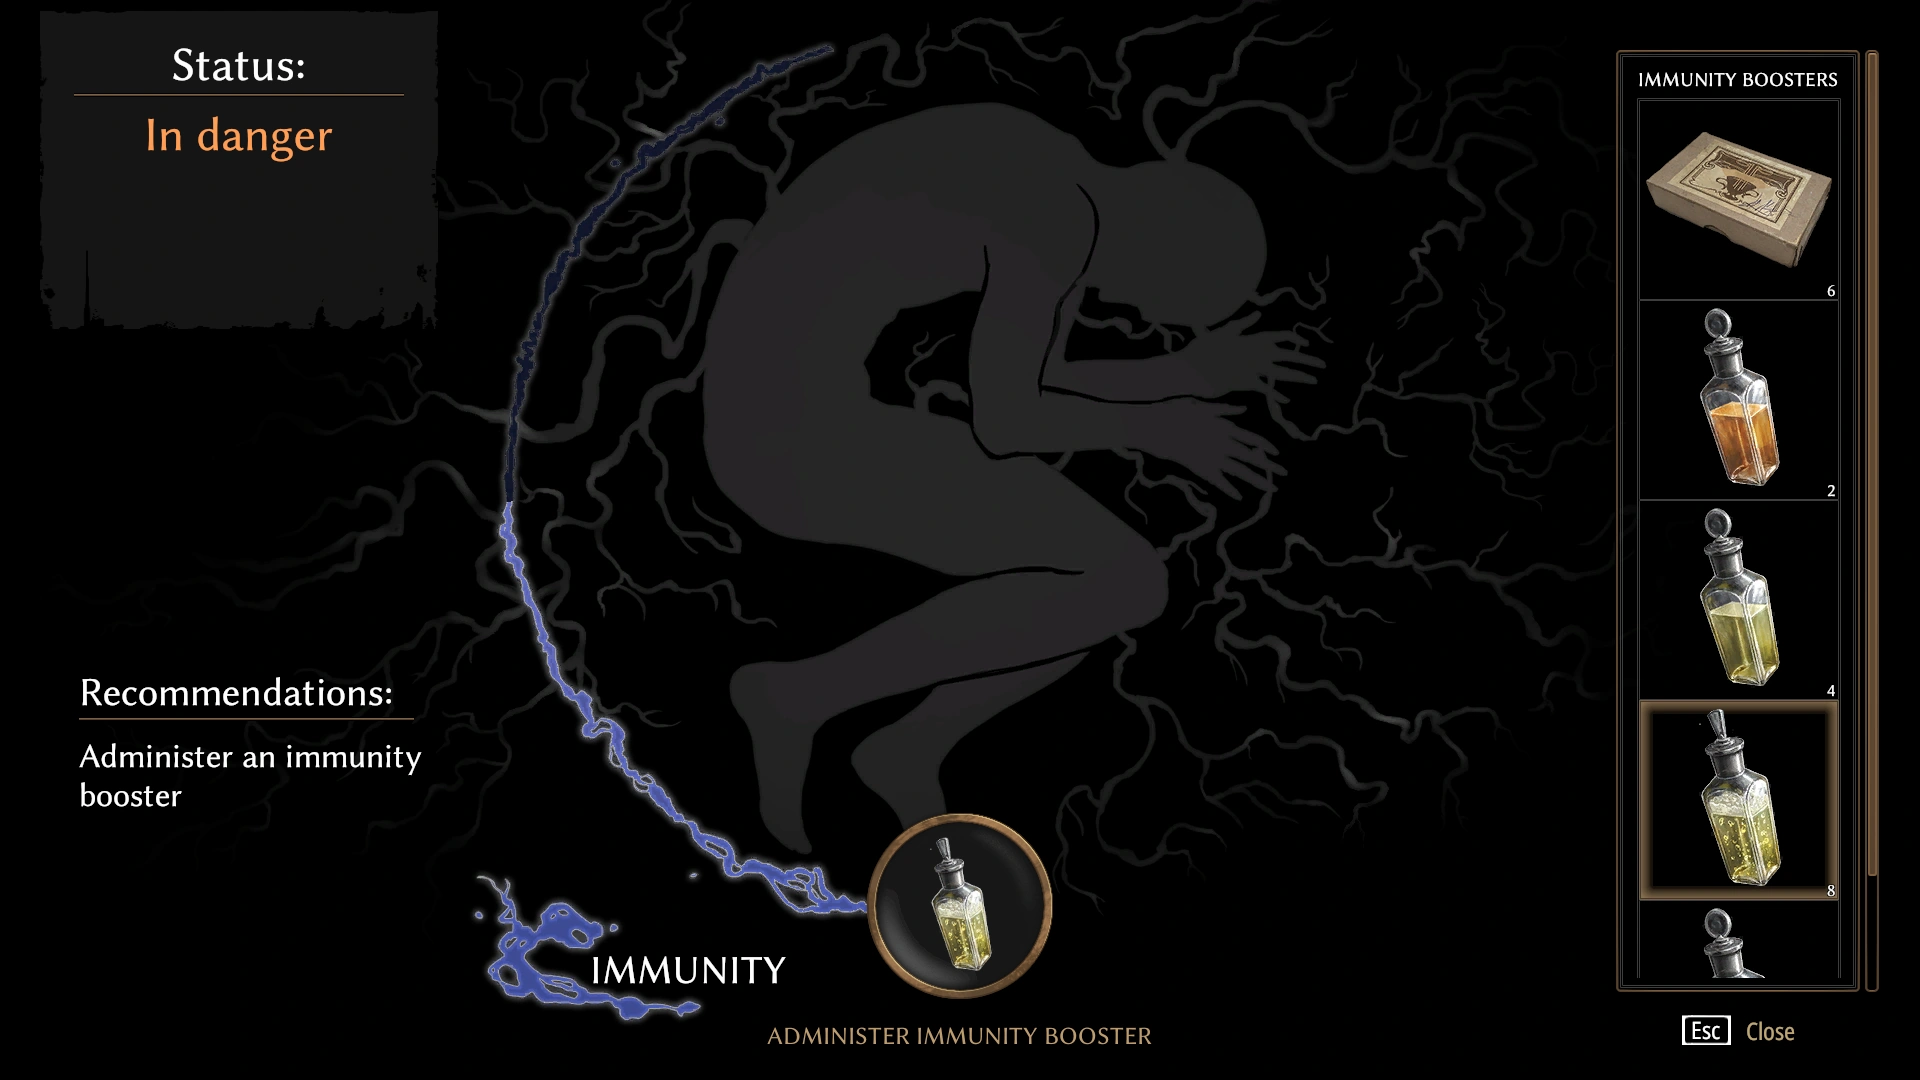
Bound Infection & Death
- Every day from Day 3 onwards, a pre-determined number of districts will become infected. At the end of each day, Bound currently living within infected districts will be under threat of becoming infected with the Plague. In order to combat this, the Haruspex can bolster Bound's immunity via prophylaxis, wherein he can issue Immunity Boosters, tinctures, or Twyrine. At the start of each day, Bound NPCs in infected districts are assigned a random immunity level, the general range of which diminishes over the course of the game.
- Days 3-6: 40-50%
- Days 7-9: 30-40%
- Days 10-11: 20-30%
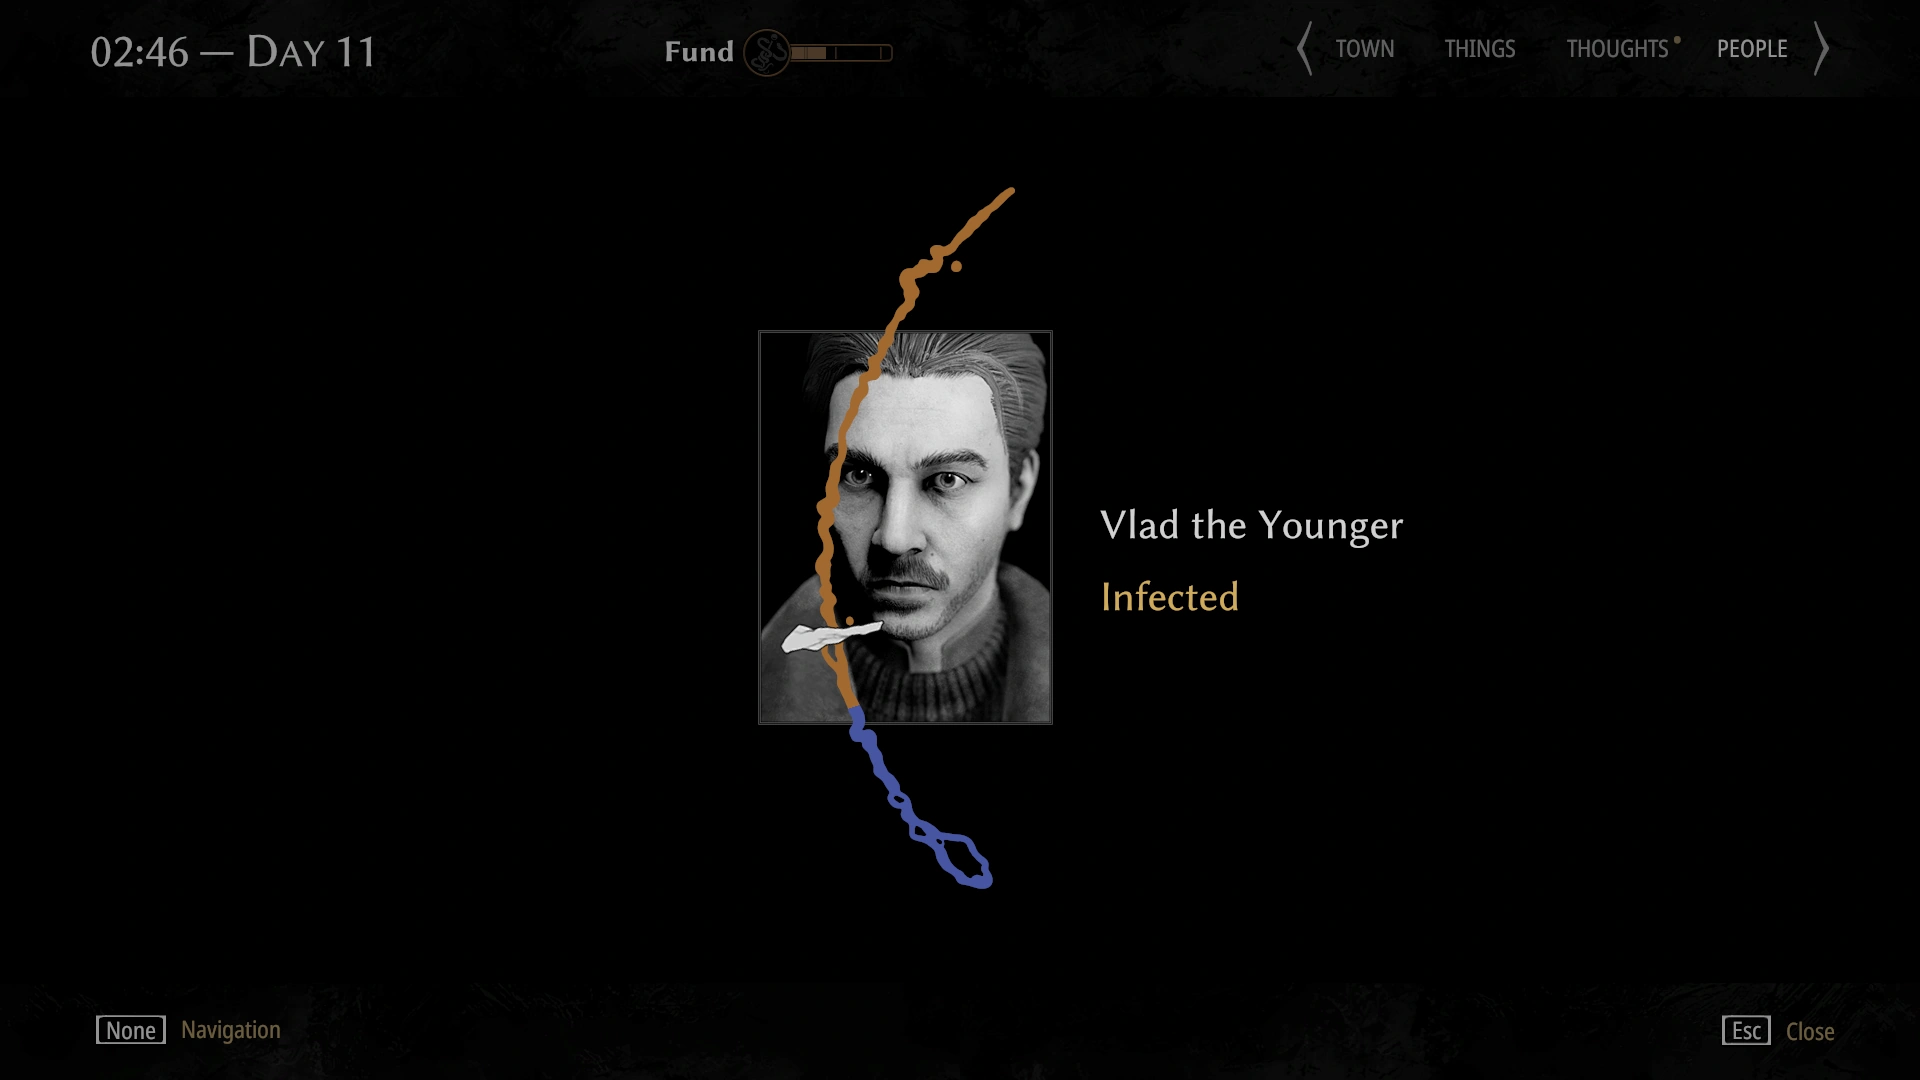
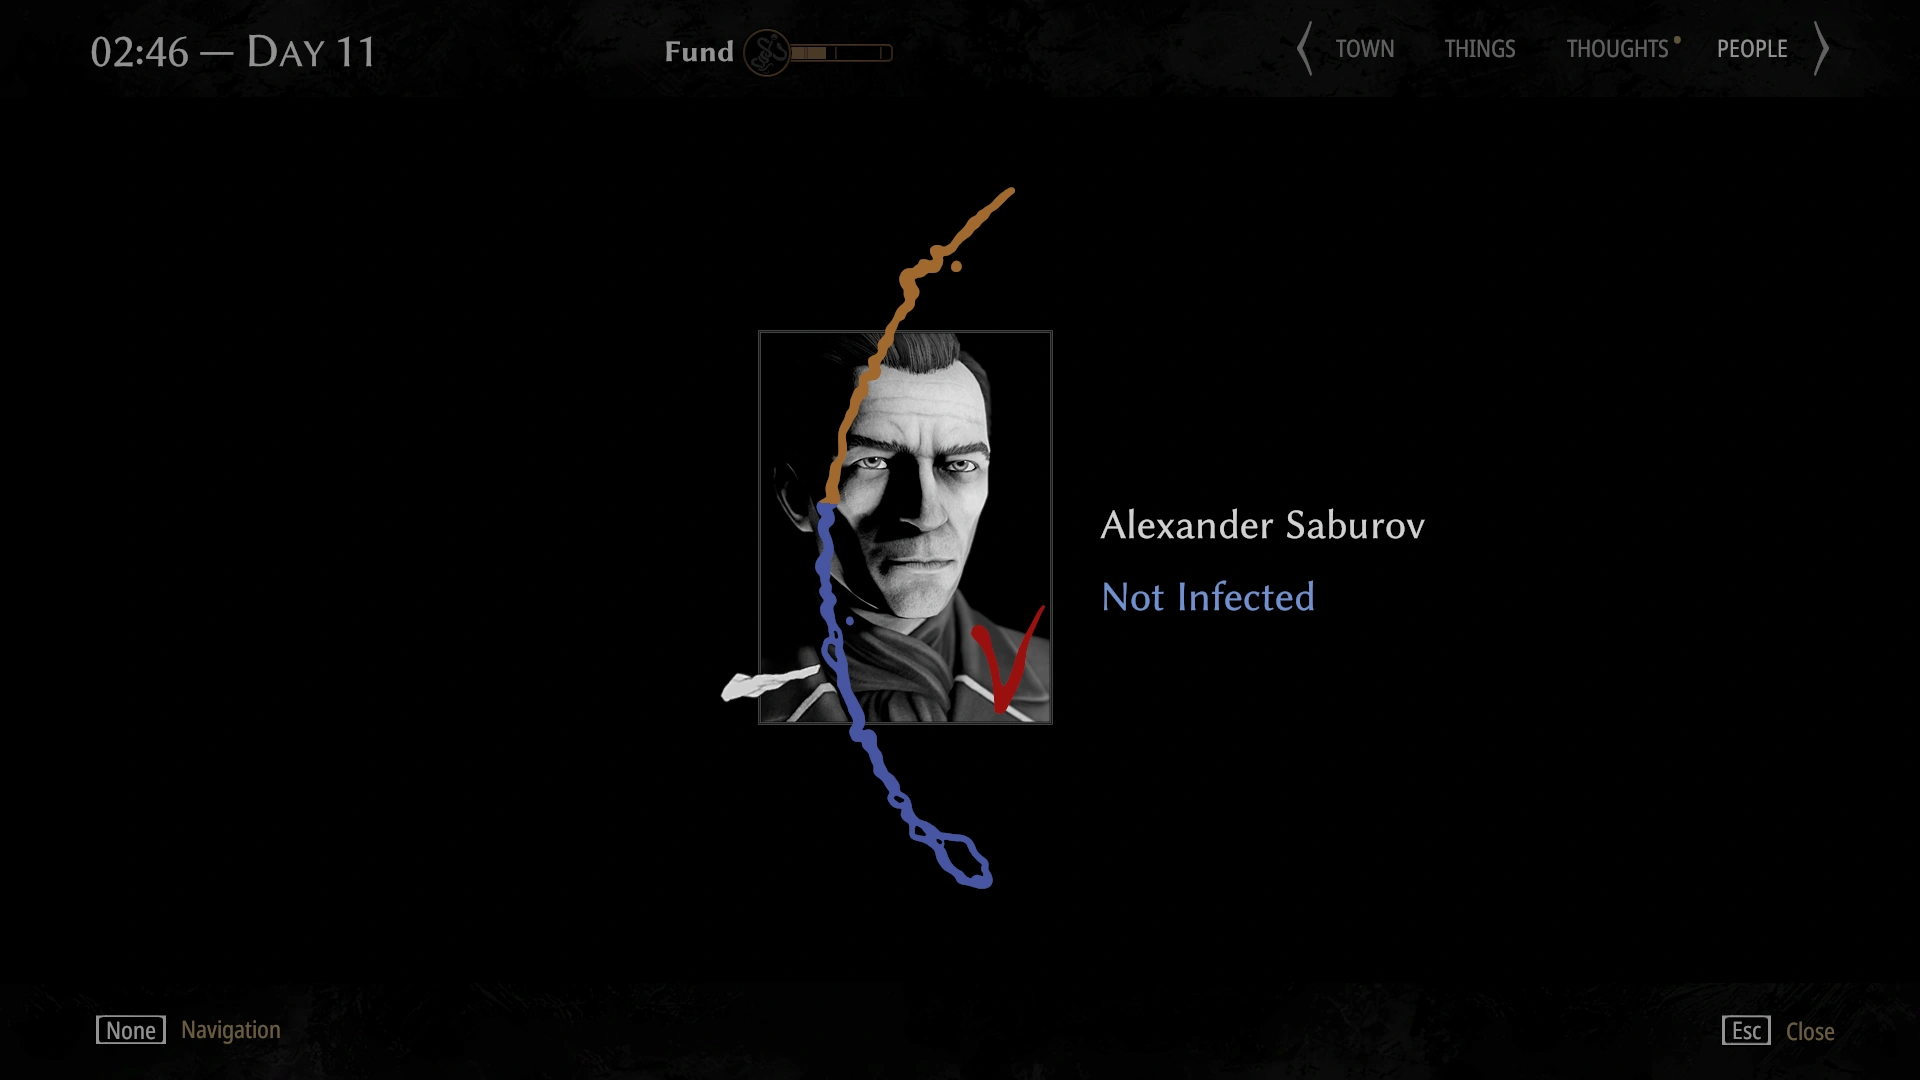
- Additionally, at 07:30 each day, Bound that are in danger of infection are also assigned a hidden infection value that is a random number within the range of 1-100. At midnight that evening, if their issued infection value is a higher number than their immunity level, they will become infected. The aforementioned prophylactic drugs can bolster Bound immunity to mitigate this, however sometimes they are assigned an infection value so high that infection is inevitable.
- At midnight, those at risk of becoming infected will receive an animation representing their odds for infection. The animation itself is superficial, however its results are consistent: Reloading the event will not change its outcome. Should the player desire new odds, they will have to reload prior to 07:30 that day.
- Regardless of their district's infection status, Bound who are already infected involve a similar albeit reversed mechanic, in that their assigned daily infection levels (and pain) gradually increase as the game progresses, and they die if their assigned (hidden) death value happens to be lower than their infection level at midnight. Currently the ranges for Bound infection levels aren't known, however they are probably an inversion to the aforementioned immunity ranges. Similarly, the ensuing animation is superficial, but the player's input is real: Prescribing antibiotics can improve Bound NPCs' odds for survival, but sometimes death cannot be escaped.
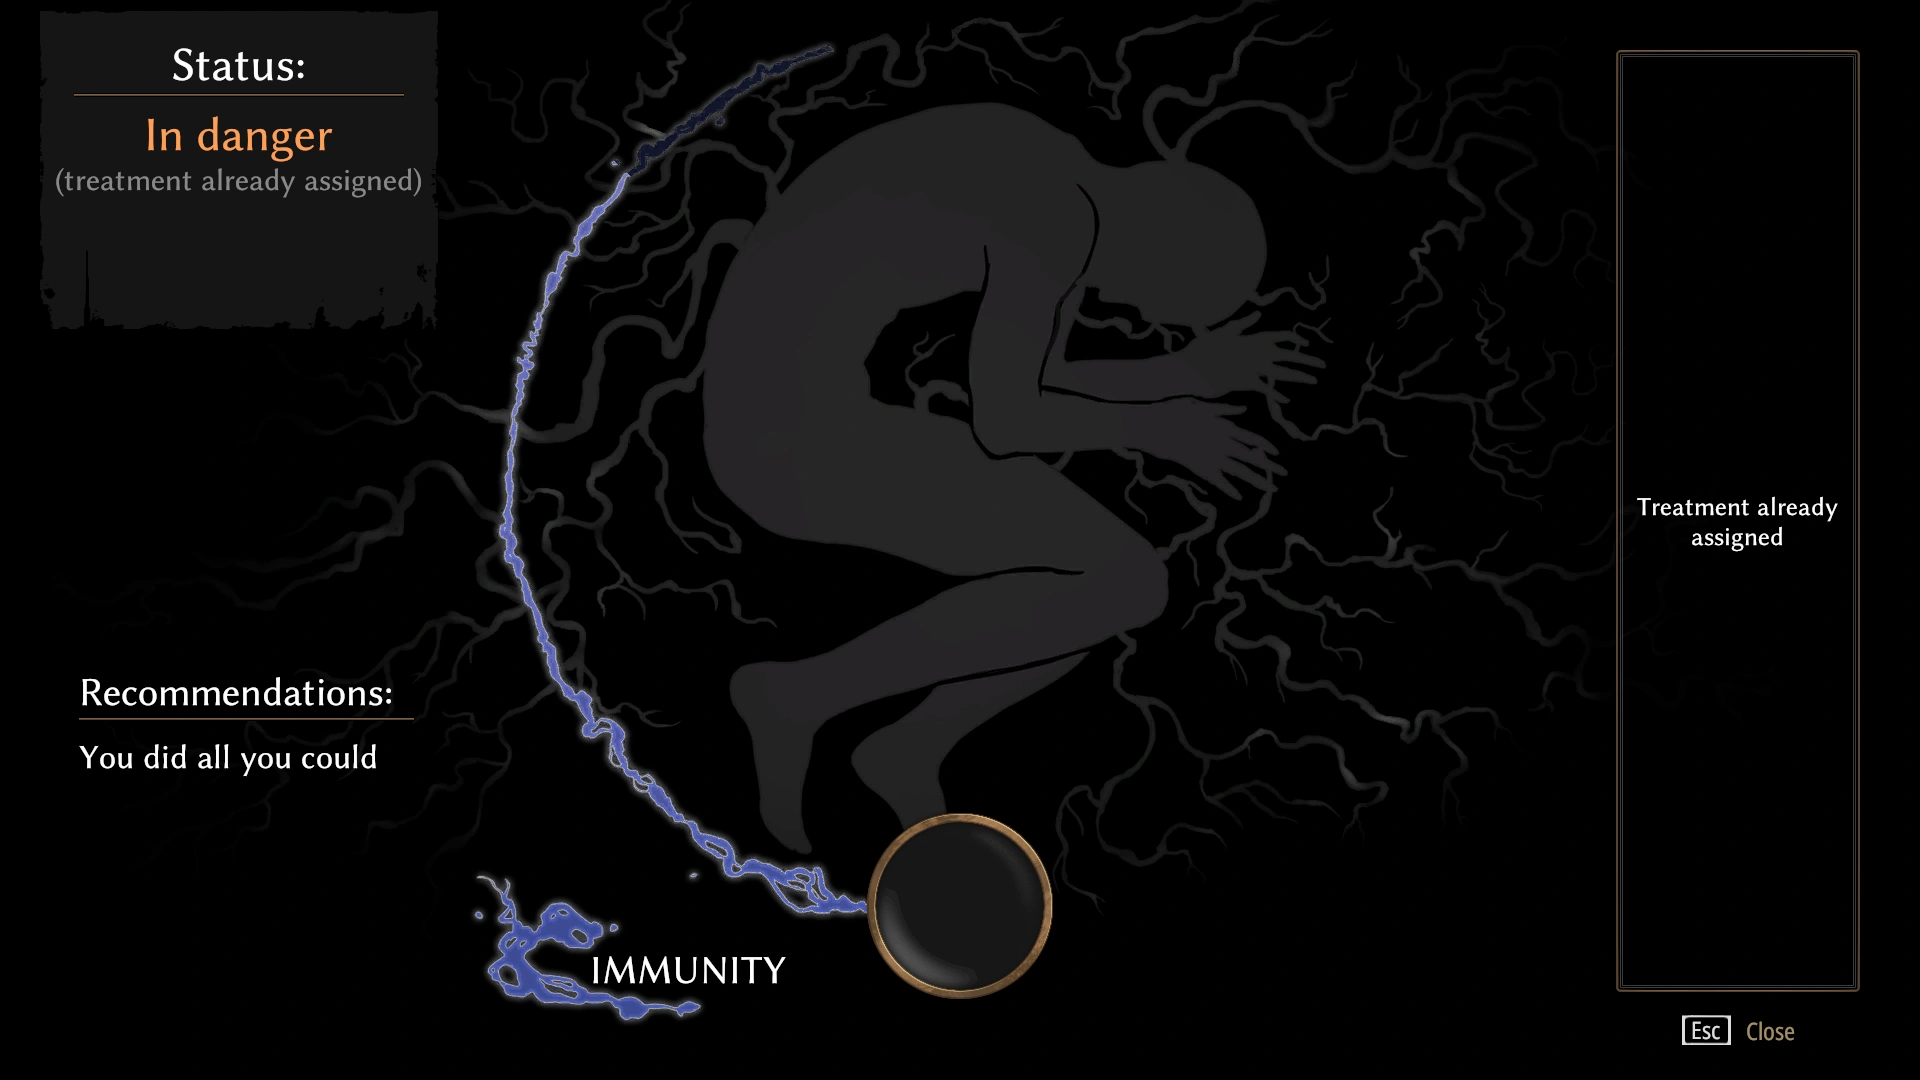
Bound Immunity menu before applying prophylaxis
Bound Immunity menu after applying prophylaxis
Midnight Bound infection roll: Infected
Midnight Bound infection roll: Not Infected
The Fund
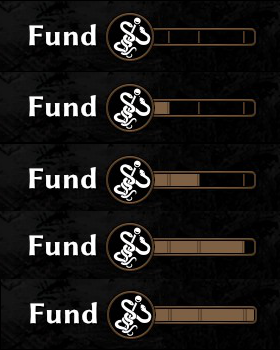
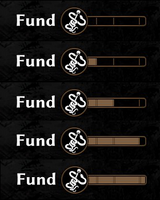
The fund meter and all its thresholds
- At the beginning of the Sand Plague outbreak, the powers of the Town create a Fund to support the local doctors. On Day 4, the Haruspex will be able to retrieve his first daily Fund reward (a "Normal" assortment of food and money) from the Town Hall. In order to be eligible for future daily Fund rewards, he will need to have completed the daily chore at the Hospital the day prior. Each reward's quality is dependent on how high the fund meter was at the prior day's close, which is raised by completing the aforementioned chore and otherwise prescribing non-bound NPCs with antibiotics. The fund meter's progress can be observed at the top of the basic menu UIs (Town/Things/Thoughts/People). The fund meter's breakpoints are as follows:
- >90%: A Generous Reward
- >45%: A Normal Reward
- >15%: A Meager Reward
- >0%: No Reward
- Depending on quality of reward, each fund reward will include the following:
- Money (Amount issued increases over time)
- Food (Small items)
- Food (Large items)
- Inquisitorial Coupons (Days 8-11)
- Drugs (Days 8-10)
- Ammo (Day 11)
- The following tables illustrate how many items are issued within each category per reward caliber. In the case of food and drugs, items are selected randomly from a list of potential candidates. In addition to the Inquisitorial Coupons found in the Fund reward's cabinet, 1 additional coupon is issued by the woman seated beside said cabinet (as of Day 7 at 07:30).
| Standard Fund Rewards | |||||
|---|---|---|---|---|---|
| Money | Food | ||||
| Day | 4-7 | 8-10 | 11 | Small | Large |
| Generous | ¤4000 | ¤7000 | ¤7500 | 3 | 2 |
| Normal | ¤2000 | ¤3000 | ¤3000 | 2 | 1 |
| Meager | ¤800 | ¤1000 | ¤1000 | 2 | 0 |
| |||||
| Food (Small) | Food (Large) | ||||
| Additional Fund Rewards (Days 8-11) | ||||||||
|---|---|---|---|---|---|---|---|---|
| Coupons (Days 8-11) |
Drugs (Days 8-10) | Ammo (Day 11) | ||||||
| Other | HP+ | Pills | Pills (+) |  |
 |

| ||
| Generous | 5 | - | - | 3 | 3 | 5 | 5 | 5 |
| Normal | 4 | - | 3 | 3 | - | 12 | 5 | - |
| Meager | 2 | 3 | 3 | - | - | 5* | - | - |
| ||||||||
| Other | HP+ | Pills | Pills (+) | |||||
- Each day's starting fund progress depends on collective reputation accross all districts, in that each district's reputation status will slightly raise the meter's progression. Between the four reputation statuses, their respective benefits to the fund meter are as follows:
- +5%: You're Respected Here
- +3%: No One Cares About You
- +1%: You're Unwelcome Here
- +0%: You're Hated Here
- The Fund meter can be further bolstered by curing non-bound NPCs. Prescribing correct antibiotics or miracles to infected Townsfolk will increase the Fund meter by 10% plus 2% for each consecutive cure (For example, the first treatment will raise the meter by 10%, the second by 12%, and the third by 14%.). Quality of antibiotic prescribed does not affect the Fund meter's progression, however incorrect antibiotics have no impact (and 25% their normal benefits to patient infection and district reputation).
Water Sources
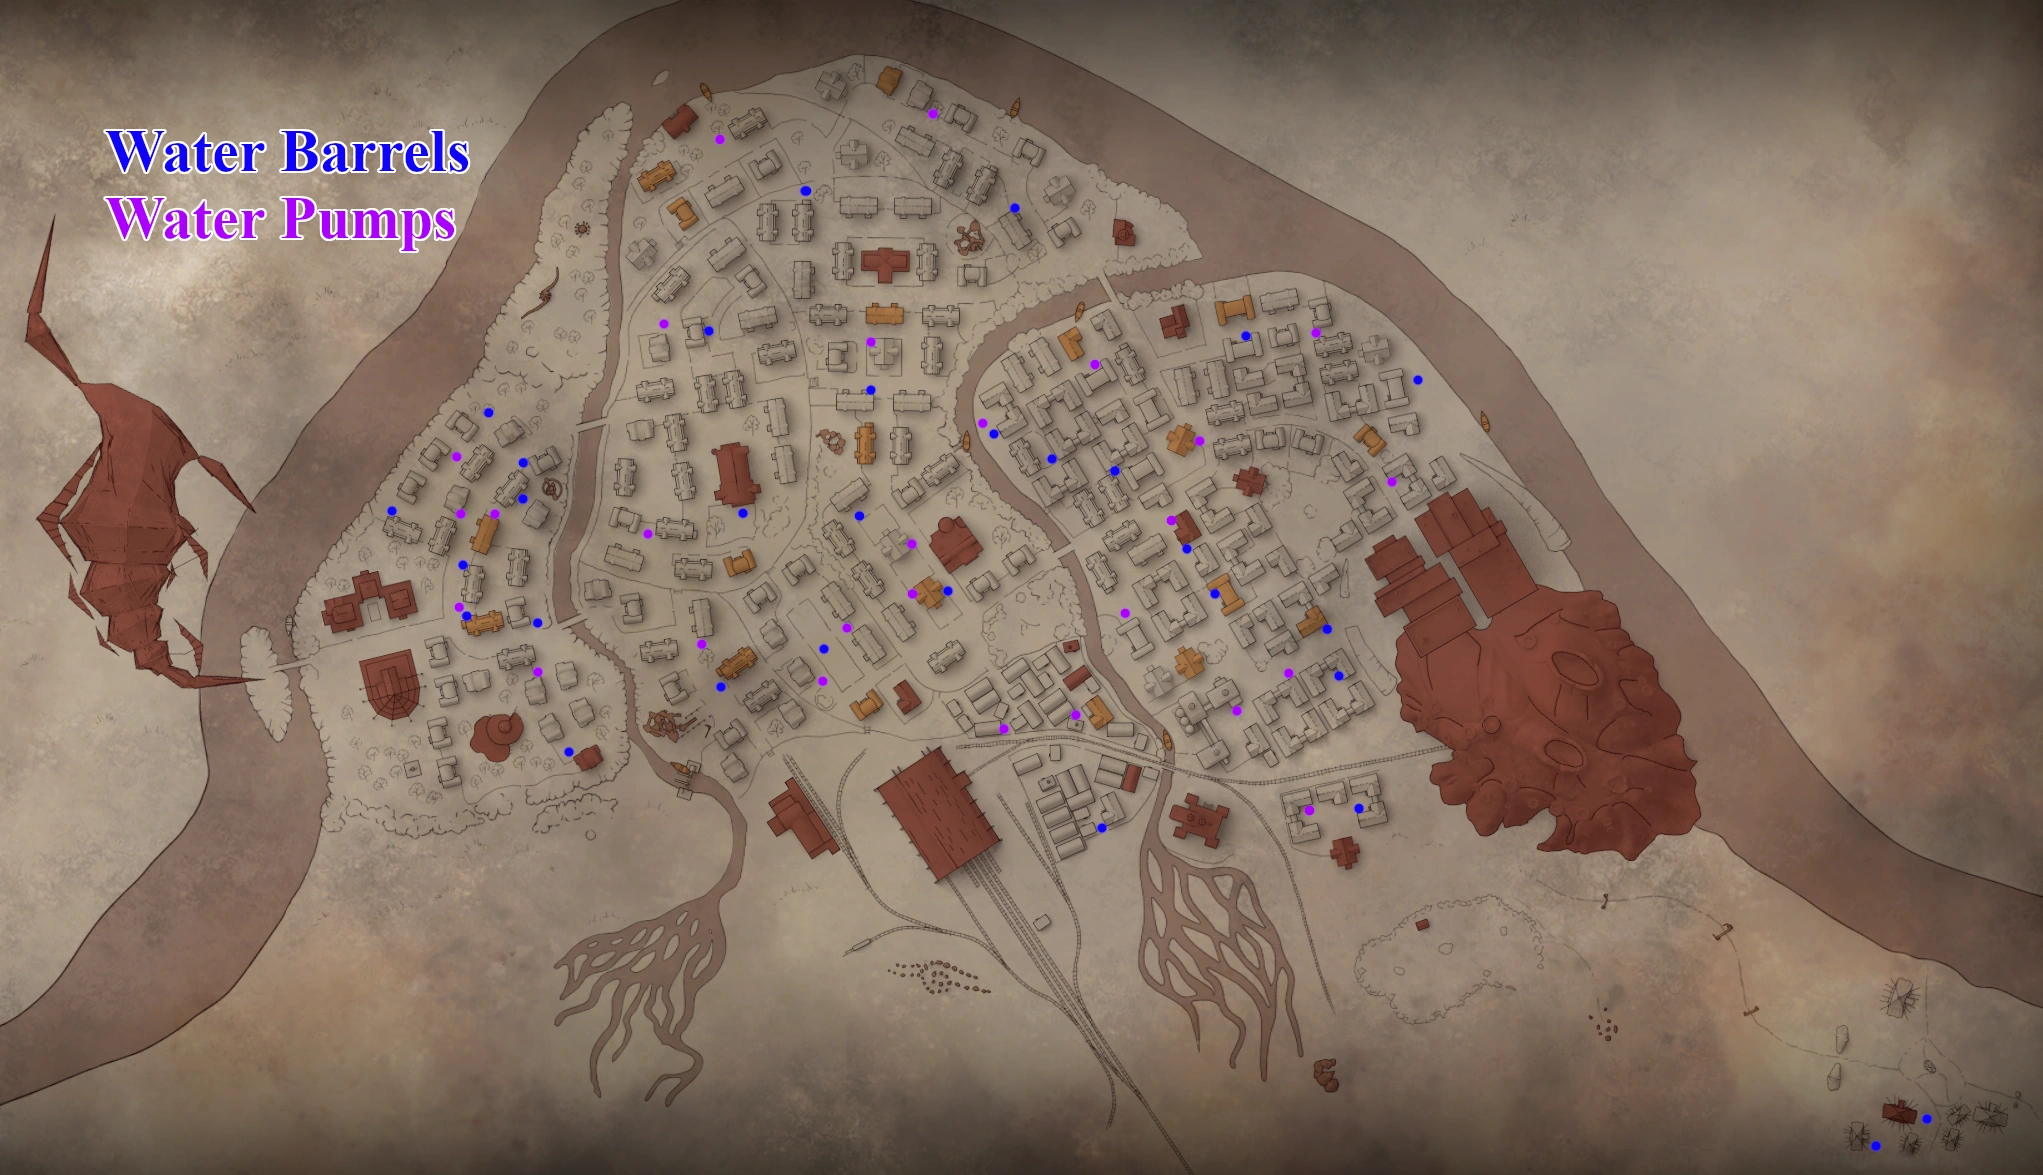

A map of all external water sources in Pathologic 2
- Initially, all public water sources are operational and produce clean water. Once the plague sets in, districts' water sources will begin to produce muddy water. At first muddy water only appears in infected districts, but by the game's latter half, water sources' infection status becomes unpredictable. Clean water can be found in infected districts, and infected water in clean districts.
- While water sources' infection status becomes unreliable, per-district sources will remain consistent: All of a districts' barrels will produce the same kind of water, and all of its pumps will also produce the same kind (however a district's pumps and barrels will not always be harmonious).
- Individual barrels and pumps' status regarding infection, drying out, and breakage appear to follow a schedule, and do not vary between playthroughs. Drinking directly from water barrels and pumps will deplete thirst entirely, whereas drinking from an individual water bottle reduces thirst by just 65%.
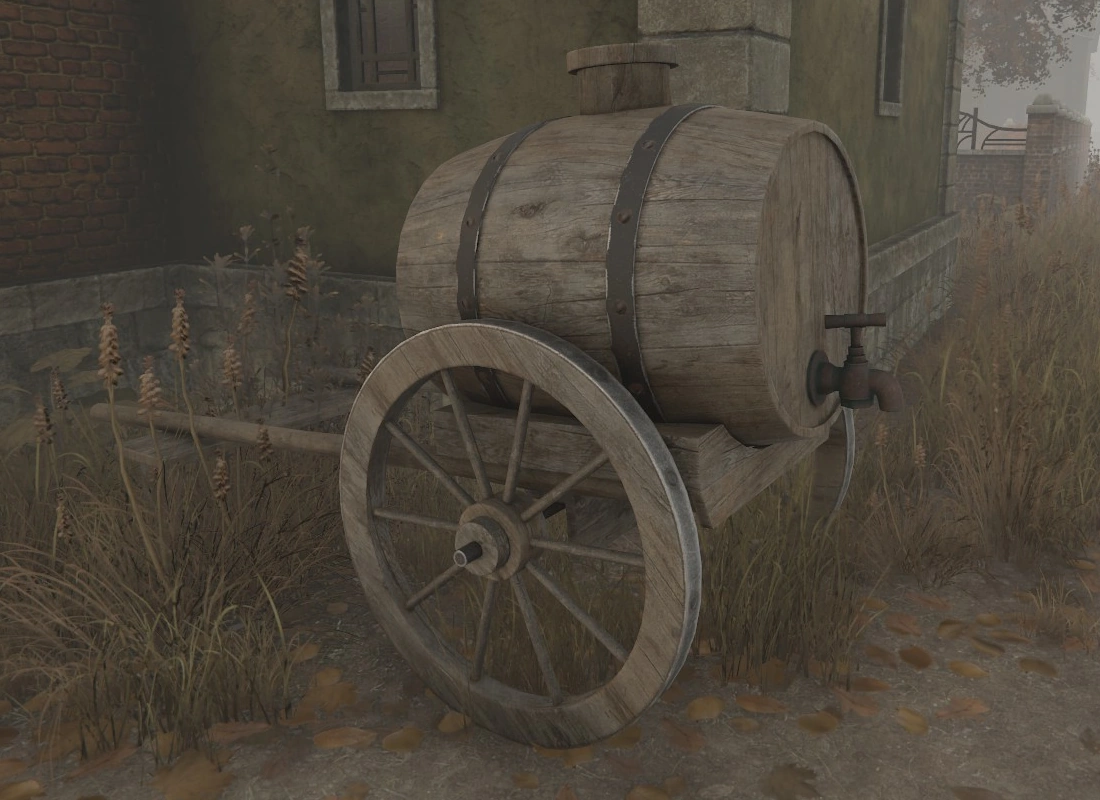
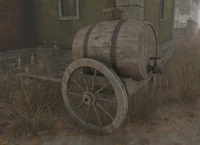
A water barrel
Water Barrels
- In addition to the aforementioned production of muddy water, barrels will begin to dry out during the game's latter half. This means they can run out of water after producing a certain amount (exact number varies), and can otherwise be found empty to begin with. Typically, if a district has two or more barrels, one of them will produce water, and the other(s) will be empty.
- On Day 4, the Haruspex will have the opportunity to deliver muddy water to the Bachelor for review. If he does this, all barrels in the Knots (central) quarter will be removed for the remainder of the game.
- The two barrels in Shekhen always produce clean water and never dry out.
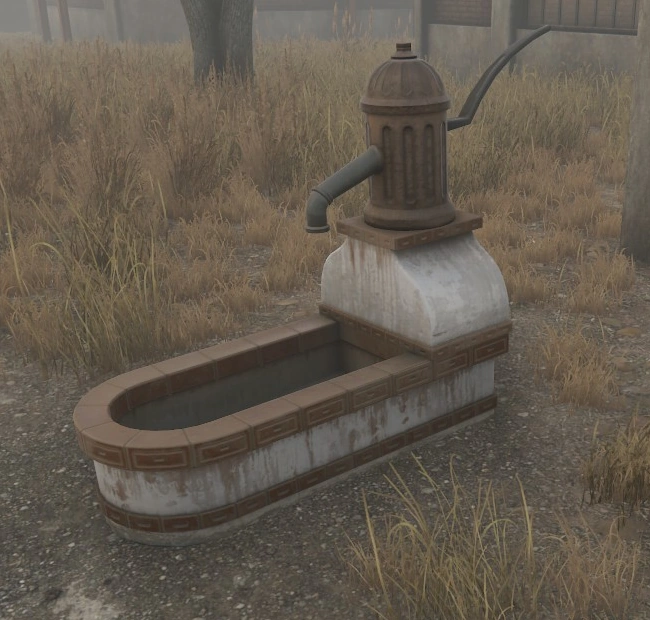
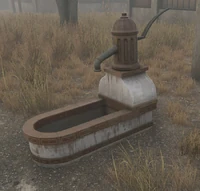
A water pump
Water Pumps
- While water pumps cannot dry out, they will eventually break over the course of the game. This first happens on Day 4, which features the game's first districts being looted and burned. Usually when a district is burned, its pumps are also broken, however on Day 4, a number of healthy district's pumps are also broken, in addition to those that were burned. A pump can be repaired by forfeiting 1 Chisel, 1 Metal Scrap, and 1 Spring. Doing so will earn a 10% boost to local reputation, and keep the pump functional until when next its district is burned. However repaired pumps do not necessarily produce clean water each day.
- Because the Bridge Square district is not burned until Day 10, its pump remains reliably intact and clean until Day 9 (at which point it becomes infected, and the following day broken). As such, this pump is the most reliable source of water in the town proper.
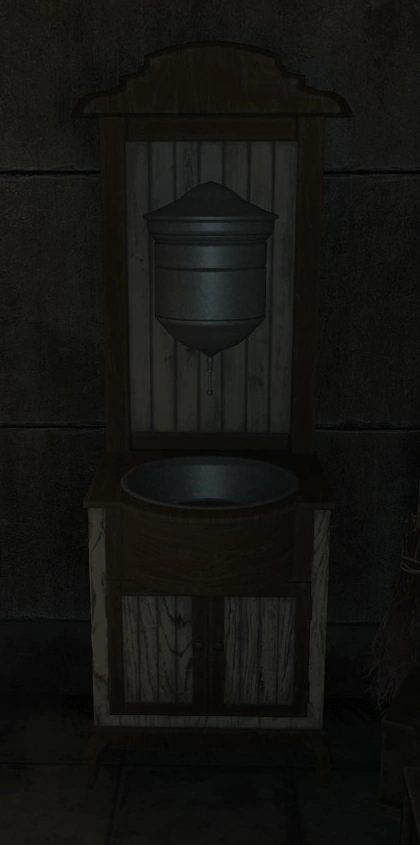

The Haruspex's sink
Haruspex's Sink
- The Haruspex's Lair has a sink that can be used three times each day, refills at midnight, and always produces clean water. If the Haruspex drinks directly from the sink, rather than bottling its water, it will reduce his thirst by just ~40%. Because Water Bottles reduce thirst by 65%, it's optimal to reserve the sink solely for refilling bottles, rather than drinking directly.
Death
- Upon every death (after Day 1), the Haruspex will wake in the Theatre. With every death the director, Mark Immortell, will apply a penalty to all of the Player's saves in their individual file. Most penalties are a decrease in total health but other punishments such as a decrease in total hunger, a decrease in total exhaustion, and miscellaneous punishments such as being cursed to occasionally find Cotton Wool or Buttons instead of organs during autopsy.
- The only way to remove the punishments for death is to restart the game with a new save file, or take the Fellow Traveler's deal.
 |
Come now, you haven't given us any time to change the set!
This entry contains potential spoilers for Pathologic 2. Read at your own risk. |
This entry contains potential spoilers for Pathologic 2. Read at your own risk.
Punishments
For further details on what happens upon dying, see Theatre of Death.
Health
- Maximum health is decreased during deaths 1, 2, 4, 5, 8, 9, 11, 13, 14, 15, 17, 18, 19, and 20. If the player receives all of the health deduction punishments, the health bar will have been reduced by 50%.
Hunger
- Maximum hunger is decreased during deaths 4, 12, and 21.
Exhaustion
- Maximum exhaustion is decreased during deaths 6 and 16.
Other
- On death 2, Mark will remove the player's ability to touch, making it impossible for the Haruspex to hug certain characters (Catnip and Lara). After death 10, the player will occasionally find Cotton Wool or a Button rather than organs when performing autopsies.
Death punishments at two deaths
Maximum death punishments
Cotton wool instead of organs (occurs upon death 10)